Assign Accommodations
Users with permissions to do so can assign accommodations to students that require them, such as text-to-speech (TTS). Accommodations like TTS are available for online testing, and others (for example, braille) are paper-based.
Step-by-Step
User roles with the appropriate permissions can assign accommodations to individual students as follows:
- Go to Rostering > Users.
- Search for the appropriate student, and then select the Edit icon in the Actions column.
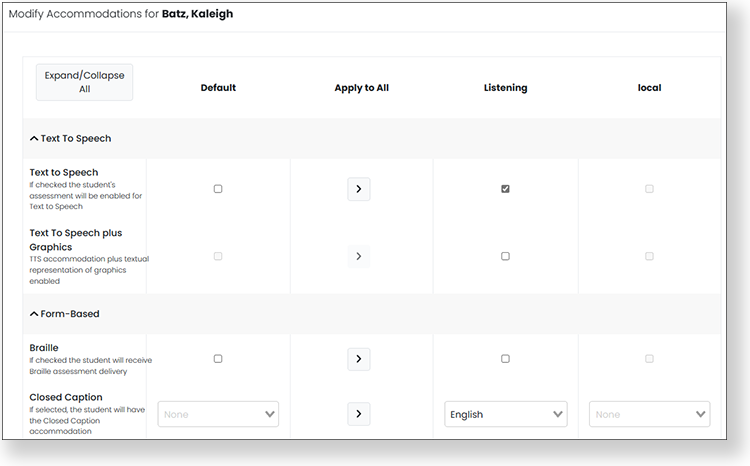
- On the Accommodations tab, select the appropriate accommodations for each accommodation profile. If a checkbox is grayed out (cannot be selected) that means that it has been selected to be available in another profile in Client Settings but is not available in the current profile.
- You can select the Apply to All button to apply the Default accommodation to all profiles.
- Select Save.
Teachers can view or edit their students' accommodations as follows:
- Select My Classes.
- Select a class.
- Select the more menu for a student, and then select Accommodations.
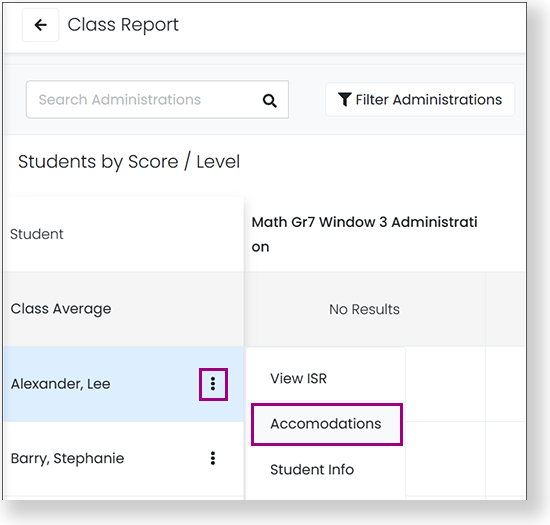
- You can change the accommodations if you have permission to do so. Select Save after making any changes.
Proctors can view student accommodations in the Proctor Dashboard by hovering over the accommodations bubble for a student. The number in the bubble indicates the number of accommodations assigned to the student. Proctors can change the TTS accommodation from the Proctor Dashboard if their role has permission.

List of Accommodations
Form-based accommodations are paper- or screen-based accommodations driven by the test form.
- Braille
- Braille plus Tactile Graphics
- Closed Caption
- Language
- Large Print
- Paper
- Screen Reader
- Sign Language
The following accommodations are available in TestNav.
- Add Time
- Answer Eliminator
- Answer Masking
- Color Contrast
- Dictionary
- Dynamic Text-to-Speech (D-TTS)
- Enable Extensions
- Highlighter
- Keyword Translations
- Line Reader
- Magnifications
- Notepad
- Online Calculator
Local accommodations are provided at the testing location, not by the test delivery platform.
- Color Overlay
- Double Time
- Extended Time
- Handheld Calculator
- Human Signer
- Read Aloud / Human Reader
- Scribe
- Temporary Accommodation
- Time And A Half
- Unique Accommodation
Custom accommodations are provided at the testing location, not by the test delivery platform.
- Alternate Aids/Supports (Support)
- Answers Recorded
- Bilingual Word Glossary for MLs (Support)
- Communication Assistance Script
- Directions in Native Language
- Extended Time (Support)
- Frequent Breaks (Support)
- Individual/Separate Setting (Support)
- Kurzweil
- Mouse Pointer
- Native Language Word-to-Word Dictionary
- No Accommodations
- Recorded Voice File
- Small Group Setting (Support)