Resolve Import Errors
To resolve errors that occurred during a local (delta) file import, first download the results from your import to see error details.
Prerequisites
- Confirm your role and project under your name, and your district or school in the Organization dropdown. If you have access to multiple projects or organizations, click each dropdown to select the one(s) you want to view or manage.
Step-by-Step
If you have already downloaded your error.csv file, skip to step 4.
- From the main menu, click (or tap) Imports/Exports. A data import list appears.
- Select only the one file for which you want to download error details.
- Click Download Results to download information for any import errors that may have occurred.
Double-click to open the .csv file. Note that this file contains ONLY records that encountered an error and the details for each error.

NOTE: The header row contains similar instructions to those in steps 5-13 below for your reference, and columns A-K contain error details. If you plan to use this file for re-import, you must delete these columns and the header row (steps 9 and 10 below) after reviewing them and resolving the errors.


Column(s) A-K Column description A-D Basic, repeated file import information. You do not need to review this repeated information. E The line number in the original file where the error occurred. Make a note of this line to ensure that you or other users enter valid values for that field in future imports.
Each time the file shows a repeated line number indicates another error on that line.F The error code. If you cannot resolve the error with the information in columns H and I, you can find additional information on error codes in Pearson Standard Layout Errors and Warnings. G A brief and general error description. H Error message associated with that error code. I More detailed information on the exact error. J The time the error occurred. K Repeated message indicating the line in this file that needs correcting. All errors for the row containing the original information appear in a separate row beneath it. - Scroll to columns H and I to review the error message and error detail. The error detail (column I) references the column that contains the original data causing the error.

- Scroll to the column referenced in column I.
- Correct the error by entering a valid value, and scroll back to columns H and I to review and correct the next row containing an error. Valid values vary, depending on your program.
Examples
Below, a field in the studentID column requires a missing value.
Below, a field in the sex column requires a spelling correction.
Below, fields in several demographic columns require a different value. The user should update the Y to either TRUE or FALSE. Note that these occur in the same row, as indicated by fields in column K with "See the line above" telling the user to reference the row that contains the original data.
- Repeat until you resolve each error within each row that contains original data. If you cannot resolve an error using provided information OR after referencing Pearson Standard Layout Errors and Warnings, contact Pearson support.
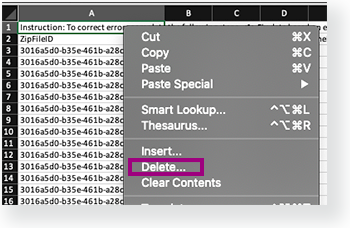
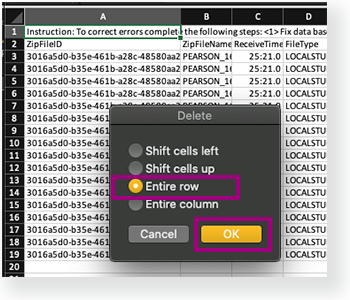
- After you resolve all errors in the file, go to row 1, right-click, select Delete > Entire row, and click OK.


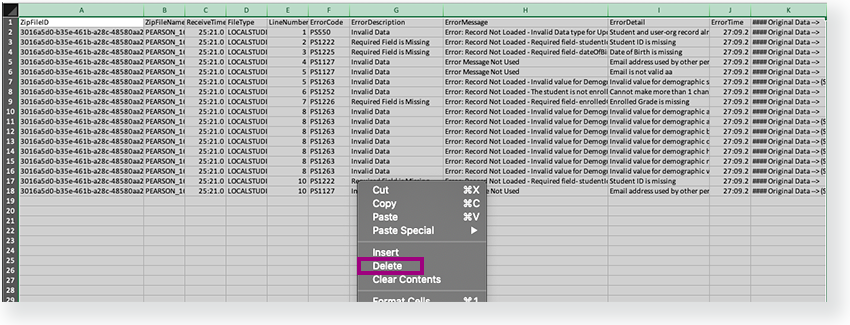
- Select columns A-K, right-click and select Delete.

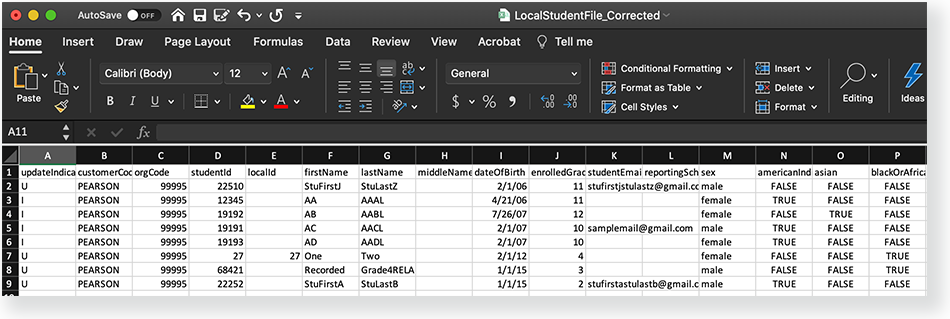
- Re-save the file with a different file name, and then import again.

Effects
- Successfully imported data is available to users in the project, based on their roles and permissions.
- Consult your headquarter or state technical/data support to address any additional errors.