There are a variety of reasons you may need to change an existing test, including making adjustments for a new school year. To change the content of a test, make modifications to the form(s) that were used to build the test. For a form that has already been administered, make a copy (clone) to use for future tests so that prior year reporting is not impacted. After any edits to the form are complete, the next step is to add it to a new test and publish so it can be scheduled as an administration.
If you have accommodated forms, be sure to make any needed edits on those as well.
- Go to AD Authoring > Forms.
- Select the appropriate Bank.
- On the Forms search page, from the Actions menu in the Actions column, you can:
- Split an Existing Form: Select Clone from the Actions menu next to the form. Edit each form, renaming the forms to match the content and deleting the items that are no longer needed on each.
- Create a copy of an existing form to modify: Select Clone from the more menu next to the form. Give the new form a district name.
- Preview
- Delete
- By selecting one or more forms with the checkboxes in the first column and then selecting the Actions menu in the top right, permissioned users can export and import metadata in CSV format.
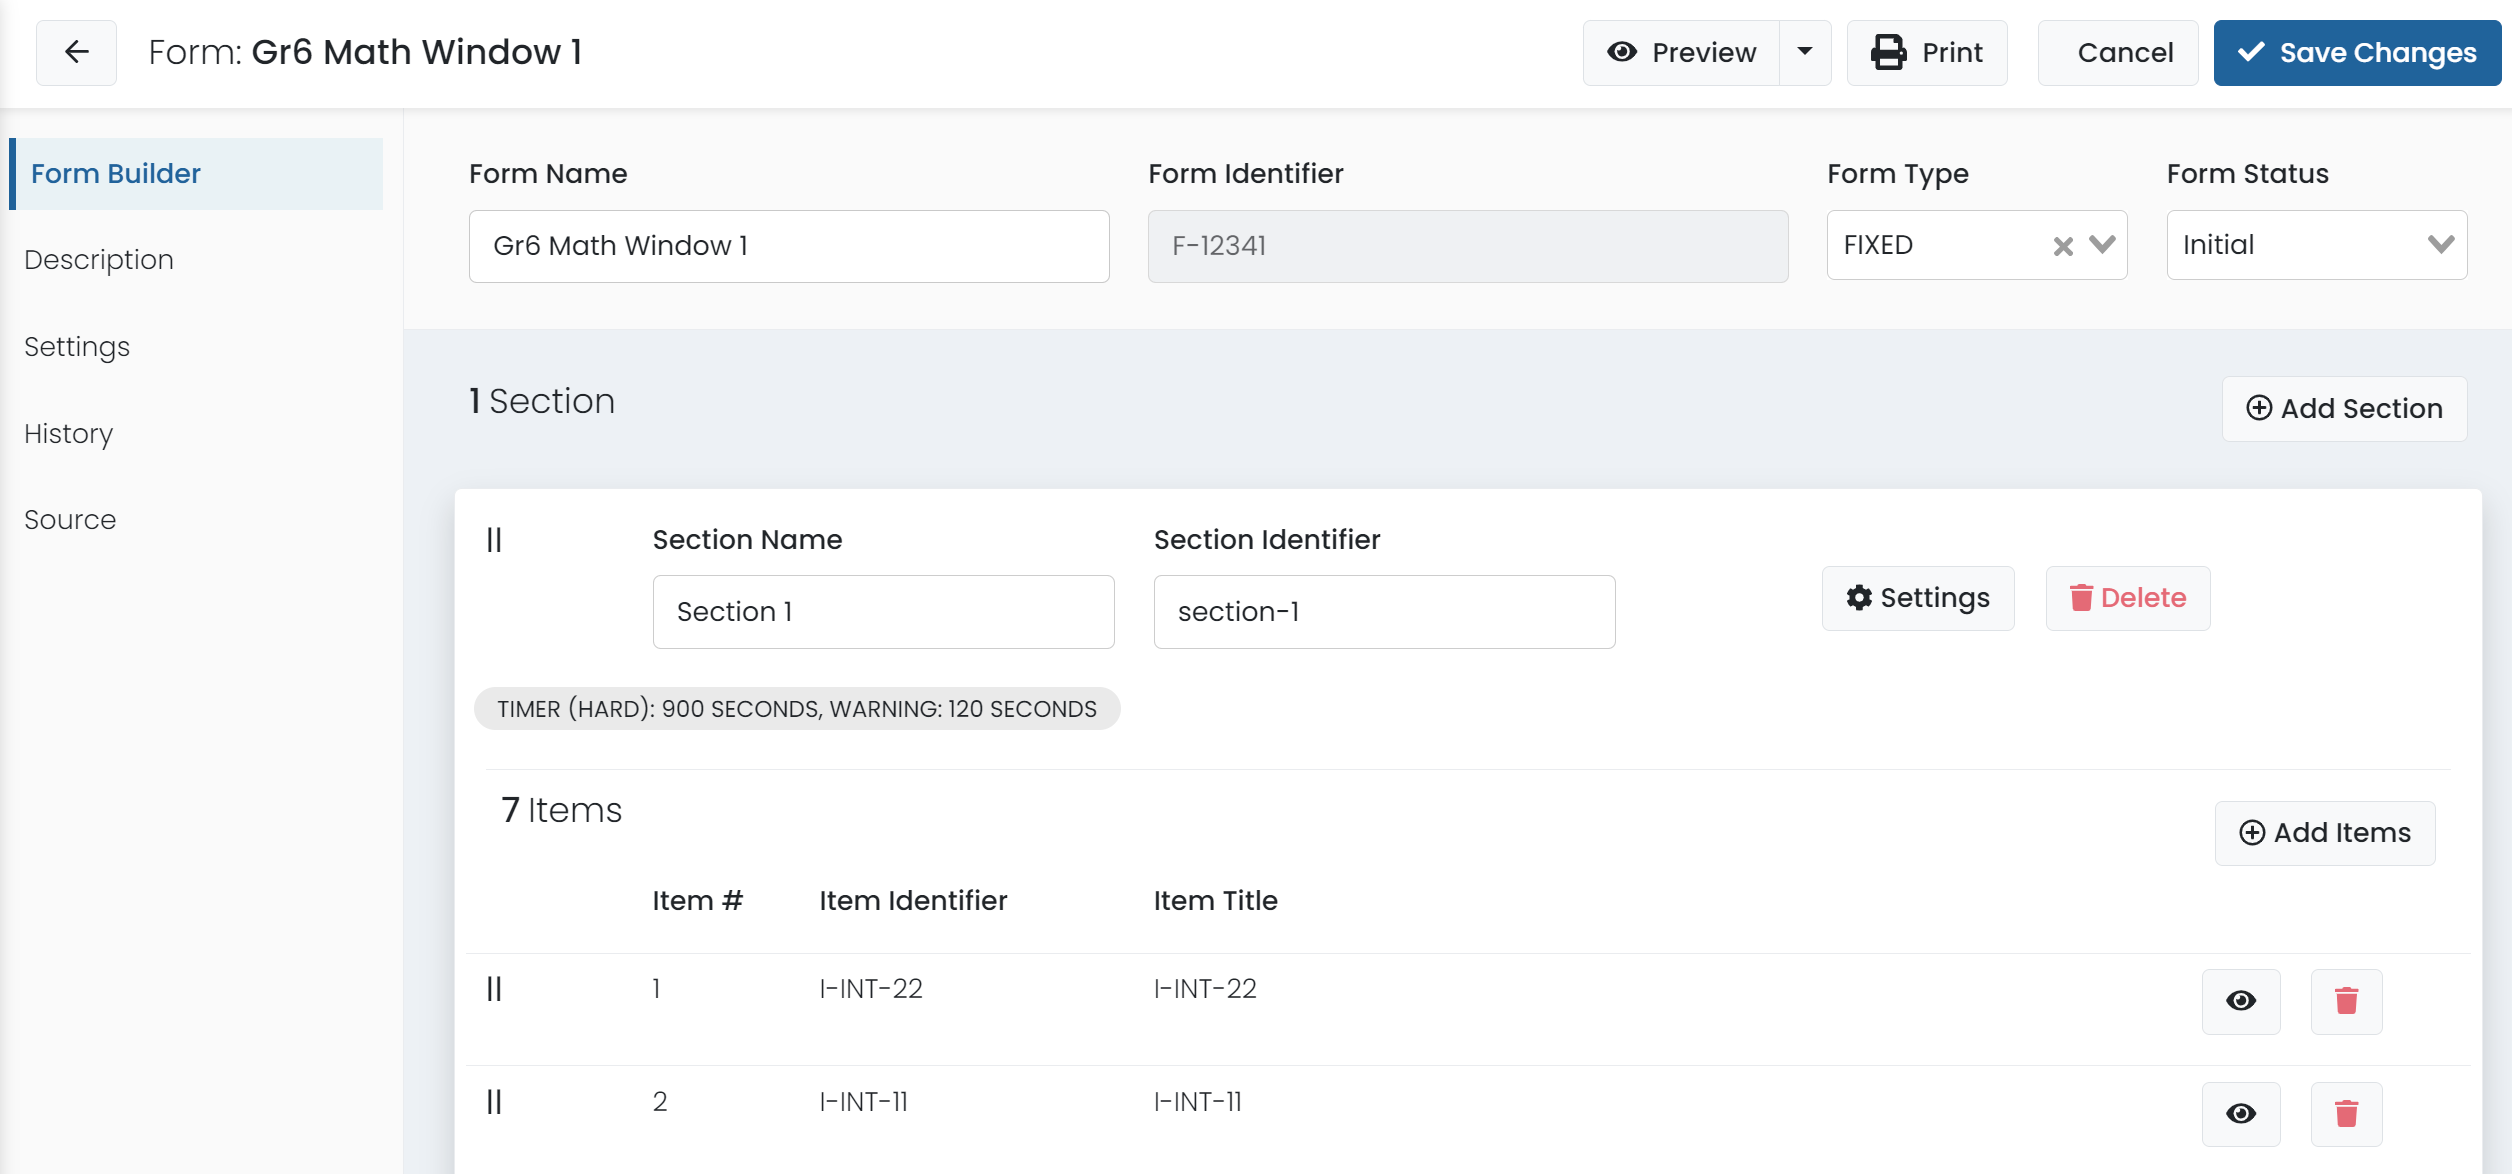
- To edit the form, select Edit from the more menu in the Actions From here, you can:
- Remove Item: Select the trashcan icon for an item.
- Add an Existing Item from the Bank: Select the Add Items button.
- Change content of an item: If the form has items that are editable:
- Select Edit from the more menu next to the form.
- Locate the item to modify.
- Copy the Item Title to your clipboard.
- Go to AD Authoring > Items
- Paste the title into the Item field to search for the item.
- Next to the item, select the edit icon to modify content. If the test has already been published, it needs to be republished.
- Create a New Item for the Form: First create the item in the bank, and then return to editing the form and select Add Items.
- Change Item Order: Use the dragger () to move an item up or down.
- Change Settings: On the Settings tab, adjust the layout and navigation options as desired.
- Add Metadata: On the Metadata tab, add or modify metadata. Note that only filters configured as part of the Item Bank settings can be added.

Sample AD Forms Page.

Sample Form Edit Page
Tiny Link: https://support.assessment.pearson.com/x/9AEnC