System: Bulletins and Dashboards
CLASSIC USER INTERFACE FUNTIONALITY*
Bulletins appear on the ADAM Home page for specified user roles. Users with permissions to do so can create, edit, and delete bulletins for users at their level of access and lower (district, school). Use bulletins to communicate important information widely and easily. If you create a new user role, remember to edit the bulletin to add the new user role to the Audience section in Step 3 below, if applicable. There is a user permission available to allow top level users to access bulletins created at any organization.
To create a new bulletin:
- Go to System > Bulletin Board.
- Select the Create New Bulletin button on the top right.
- Enter bulletin details.
- Title: Enter a descriptive title.
- Message: Enter and format your message. You can include images, video, tables, links, etc.
- Pinned: Pin the content to ensure it does not expire until you manually delete it.
- Posting and Expiry Date: Select a date to post your bulletin and a date for it to expire (unless it's pinned).
- Type: Select None, Documents, Announcement or News.
- Audience: Select the user roles, such as Teacher or Student, that will be able to view the bulletin.
- Notify Audience by Email: Select the checkbox to notify the selected audience of the bulletin.
- Attachments: Upload one or multiple files to a single post. These can be removed by editing the post if needed. The max file size is limited to 10MB per file, with the accepted file types of: .pdf, .doc, .docx, .ppt, .pptx, .xls, .xlsx .txt .csv.
- Select Save or Send & Save, depending on whether you choose to notify the audience.
To edit or delete a bulletin you created:
- Go to System > Bulletin Board.
- Find the bulletin you want to edit or delete.
- Select the Edit icon or the Delete icon.
- If you select the Edit icon, edit your bulletin and then select Save.
- If you select Delete, enter the bulletin name in the field and then select Delete.


UPDATED USER INTERFACE FUNCTIONALITY
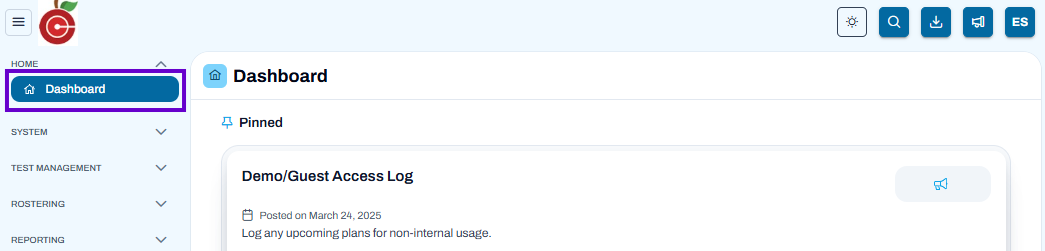
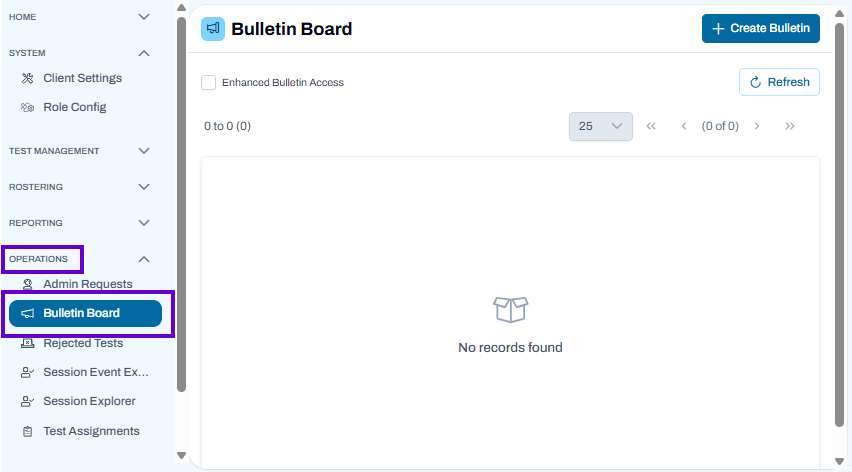
In the ADAM 2.0 interface, the Bulletin Board is now displayed as the Dashboard. While users access bulletin board announcements and updates through the Dashboard, all bulletin board configuration and management settings remain available under Operations > Bulletin Board.
Bulletins appear on the ADAM Home page for specified user roles. Users with permissions to do so can create, edit, and delete bulletins for users at their level of access and lower (district, school). Use bulletins to communicate important information widely and easily. If you create a new user role, remember to edit the bulletin to add the new user role to the Audience section in Step 3 below, if applicable. There is a user permission available to allow top level users to access bulletins created at any organization.
To create a new bulletin:
- Go to Operations> Bulletin Board.
- Select the Create New Bulletin button on the top right.
- Enter bulletin details.
- Basic Information (* equals required fields)
- Title: Enter a descriptive title.
- Message: Enter and format your message. You can include images, video, tables, links, etc.
- Schedule & Display
- Posting and Expiry Date: Select a date to post your bulletin and a date for it to expire (unless it's pinned).
- Pinned: Pin the content to ensure it does not expire until you manually delete it.
- Label: Select None, Documents, Announcement or News.
- Audience
- Select Roles: Select the user roles, such as Teacher or Student, that will be able to view the bulletin.
- Notify Audience by Email: Select the checkbox to notify the selected audience of the bulletin.
- Attachments: Upload one or multiple files to a single post. These can be removed by editing the post if needed. The max file size is limited to 10MB per file, with the accepted file types of: .pdf, .doc, .docx, .ppt, .pptx, .xls, .xlsx .txt .csv.
- Basic Information (* equals required fields)
- Select Save or Send & Save, depending on whether you choose to notify the audience.
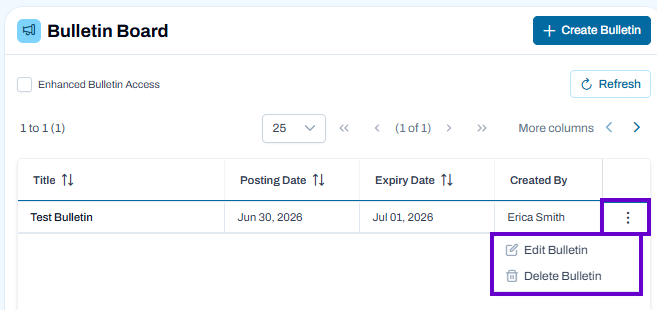
To edit or delete a bulletin you created:
- Go to Operations > Bulletin Board.
- Find the bulletin you want to edit or delete.
- Select the Edit icon or the Delete icon.
- If you select the Edit icon, edit your bulletin and then select Save.
- If you select Delete, enter the bulletin name in the field and then select Delete.