Use the Form Builder tab to organize the items for this form. Here, you can create multiple sections and load items into a section.
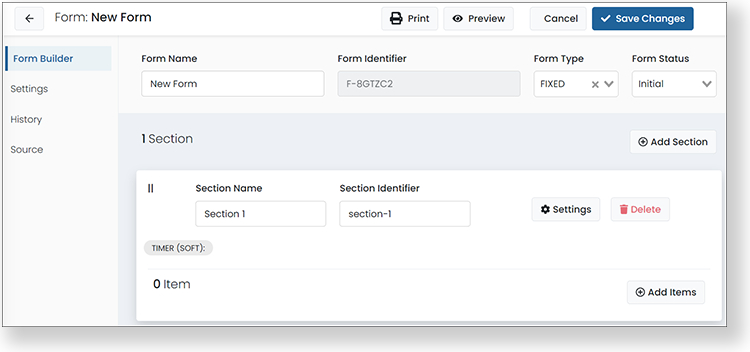
- Enter the form information:
- Form Name
- Form Identifier: Automatically generated.
- Form Type: Fixed or Adaptive type. Only computer-adaptive testing (CAT) compatible items can be added to Adaptive forms.
- Form Status: Statuses are defined during Bank Setup. Choose the appropriate Form Status from the list.
- Enter the Section Name and Section Identifier (usually a version of the section name without space). If the form only has one section, you can simply repeat the form name or call it Section 1 of 1, etc.
- Define the Settings for each section:
- Calculator: Select a calculator if needed (basic, scientific, or graphic).
- Use Timer: Select the checkbox to use a timer. Enter the Time Limit (in seconds), the Warning Time (in seconds), and the Time Limit Type. The warning time is the time remaining when the warning is displayed to the student. A soft warning does not force the student out of the section when the timer expires. A hard warning forces the student out of the section when the timer expires.
- Show Instructions Screen: Select the checkbox to show students instructions for the forms. Select Add Screen to choose an existing Resource instructions page. You can add the Resource page later if you haven't already created it. See also: Create Instructions for a Form - DRAFT
- Select Save Settings .
- Select Add Items to add test items to the form. Each section must contain at least one item.
- Select the bank that contains the item(s) you want. You can add items from multiple banks, if needed.
- Search for and select the checkbox for the items to add to the form.
- Select Add Items to add the items into the section.
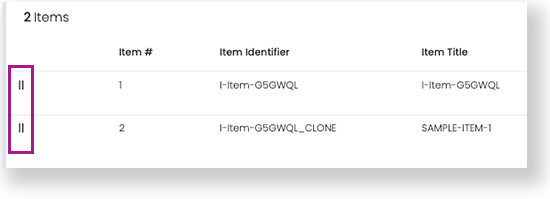
- Use the dragger bars to rearrange the items as needed.
- Select Add Sections to add additional sections as needed.
- Select Save Changes.