When a student submits a test, the system validates test details (organization, enrollment, and student record). If the system cannot validate these details, it rejects the test and displays invalid information in the test status for correction. After you correct these details, the system accepts the test. You do not need to immediately fix a rejected test.
- This task is most often used for paper testing.
- This task does not permit you to change a student's responses
Step-by-Step
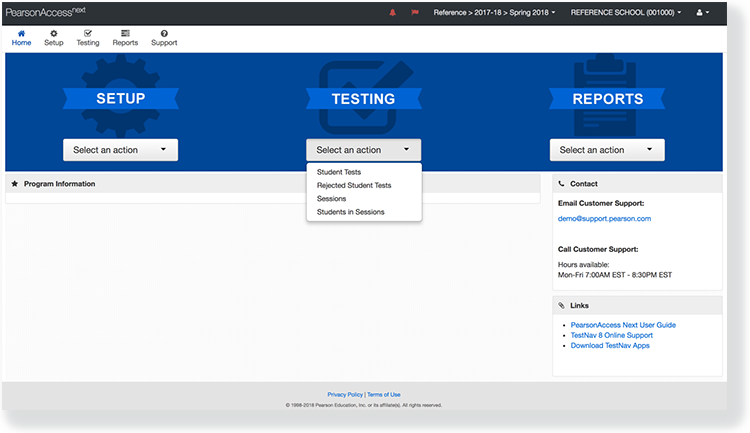
From Testing, select Rejected Student Tests.
Search to find the rejected test(s) you want to view and fix.

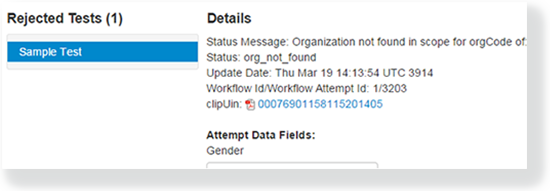
The Status Message column in the list tests tells you why the system rejected each test
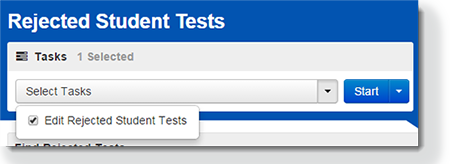
Click Select Tasks, select Edit Rejected Student Tests, and click Start.
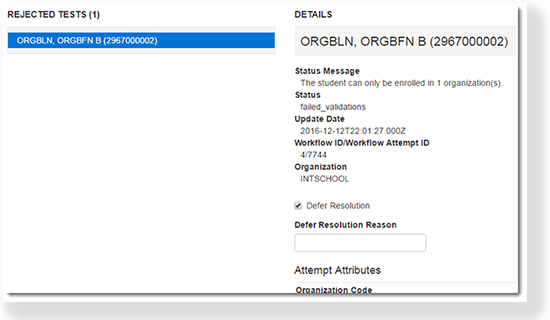
Find the rejected test you want to view and fix under Rejected Tests and edit the invalid information.
To defer a test, select Defer Resolution, and under Defer Resolution Reason, specify the reason.
Click Save.
Effects
When you fix the rejected student test, the system automatically validates it again. If there still is an error, the test status continues to display invalid information in the test status. When the entire record completes all validations, the system aggregates the information for reporting.