
Technical Bulletin - Confirm Managed Devices and Force Re-enrollment
Published: April 20, 2023
What is happening?
Pearson support is aware that students assigned managed ChromeOS devices can bypass security settings by performing a series of complex processes that include resetting the device to factory settings (powerwashing or wiping) and then reconfiguring the device as unmanaged.
Pearson does not support unmanaged ChromeOS devices for secure testing, and we recommend checking each device's managed status before testing. We also recommend disabling developer tools on devices used for student testing.
What does this mean?
To prevent students from testing on unmanaged (non-secure) ChromeOS devices, technology personnel should
Check the managed status of each device before testing. Proctors can also complete this task.
Disable developer tools on each testing device.
- Set each device to force re-enrollment as a managed device after it's powerwashed/wiped and restarted for reuse. This is a best practice.
- Check the managed status of each device before testing. Proctors can also complete this task.
See instructions for processes below.
What do I need to do (and how do I do it)?
To check the managed status of each device:
When the student turns on the ChromeOS device, check the screen where the account icon appears.
Below the account icon and the start arrow, a managed device will display the managed device icon (
 ) and the domain that manages it. The example below shows Chromebook managed by your-domain_here.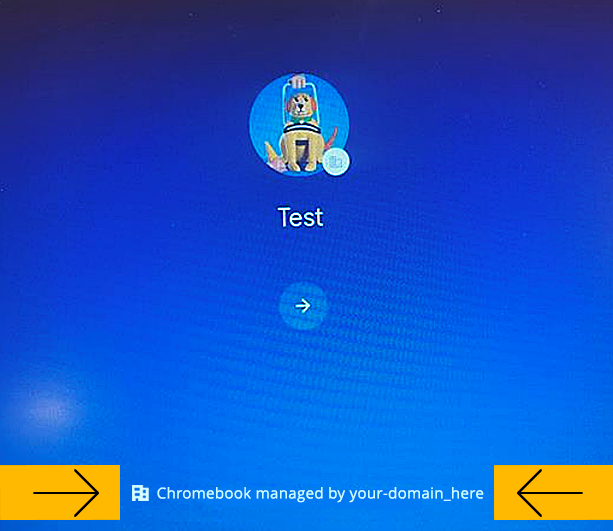
| Digi Accordion | ||
|---|---|---|
| ||
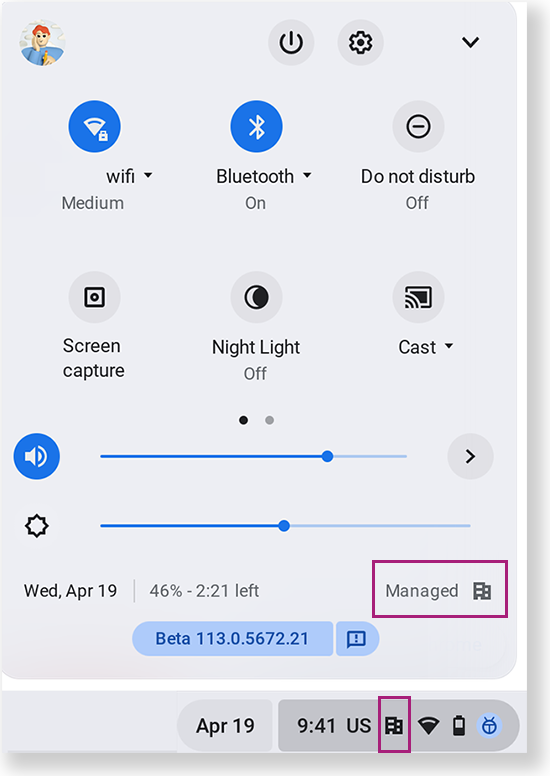
You can also see the managed icon at the bottom-right of the screen in the status bar. The status bar includes the time, the managed icon (if managed), and more. Selecting anywhere in the status bar opens its menu, where you can also see that the device is managed. Click to enlarge.
|
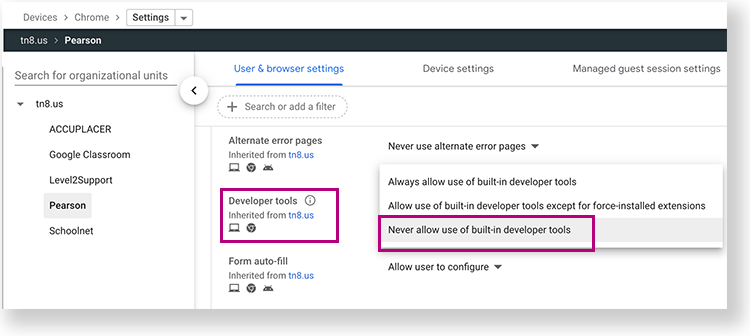
To block Chrome developer tools:
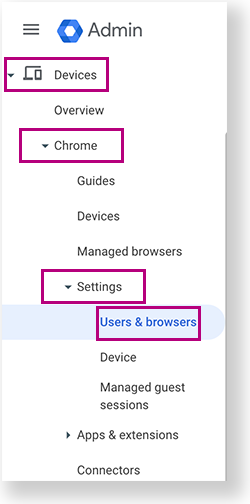
Sign in to your Google Admin Console and select Chrome > Settings > Users & browsers.
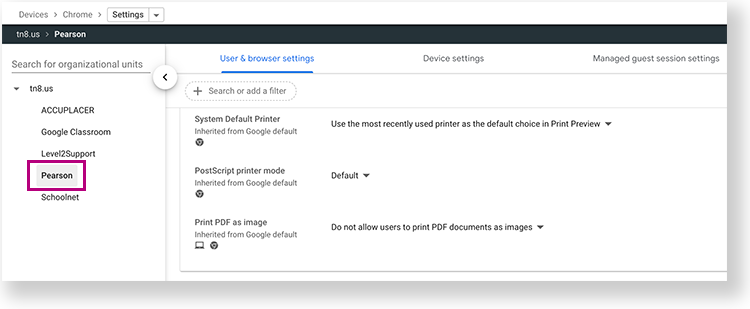
- Select or search for the organizational unit for which you want to apply (or verify) these settings. The example below shows Pearson as the intended organization. Your organization will be a district or school.
- Search for Developer tools in the User experience section. Then, select Never allow use of built-in developer tools.
To set or verify your organization's forced re-enrollment settings:
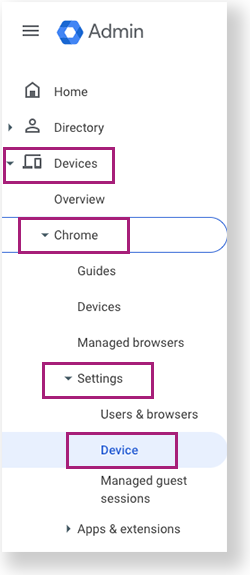
Sign in to your Google Admin Console and select Devices > Chrome > Settings > Device.
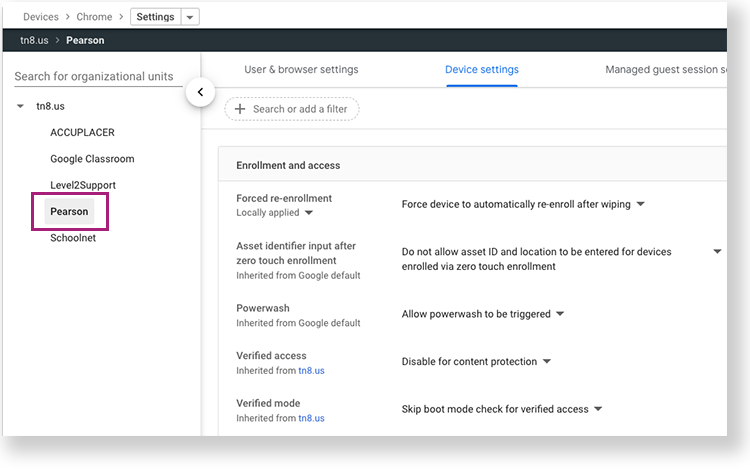
Select or search for the organizational unit for which you want to apply (or verify) these settings. The example below shows Pearson as the intended organization. Your organization will be a district or school.
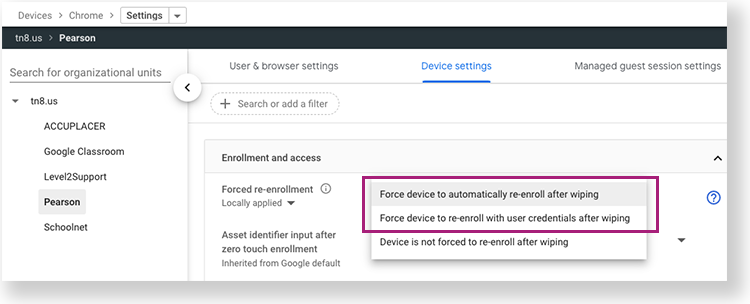
In the Forced Re-enrollment section, select one of the options below:
- Force device to automatically re-enroll after wiping.
- Or, Force device to re-enroll with user credentials after wiping.
| Excerpt | |||||||
|---|---|---|---|---|---|---|---|
To check the managed status of each device:
|
| Info |
|---|
Pearson will provide an update on resolution status once one has been reached either by Google or Pearson engineering. Monitor TestNav Online Support's Recently Updated page for the most current information. |