| Anchor |
|---|
TOP | TOP | | Anchor |
|---|
RI | RI | You can create a
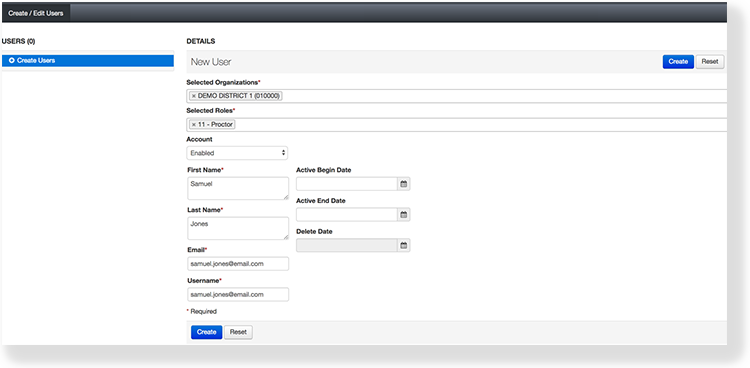
user to add an account holder by entering personal and system-related information. For example, you can enter a user ID and email address, and assign this user to an organization. When you assign the user to an organization, you define the data he or she can access.
You can also specify a date range for account access. Doing so ensures that the user can log in only during the specified date range.
To learn about user account data fields, see User Account Data Fields.
| Anchor |
|---|
| UI Text Box |
|---|
|
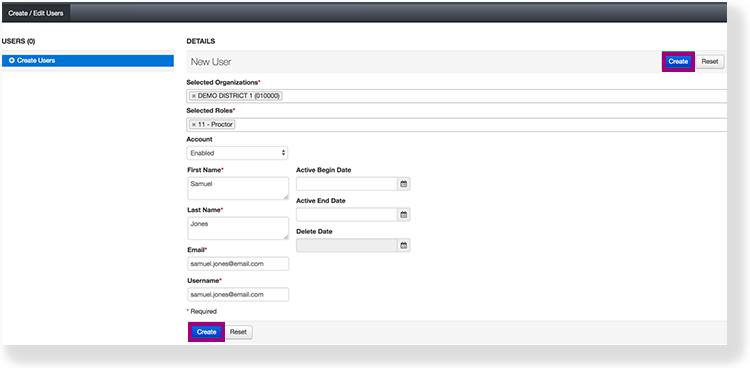 Image Added
| Anchor |
|---|
Effects | Effects | EffectsAfter you create a user, you can view user account information.
| Expand |
|---|
| title | To view user details... |
|---|
|
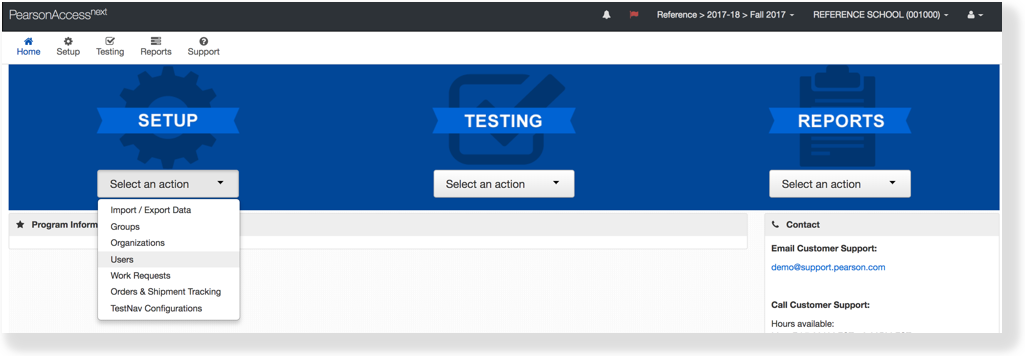
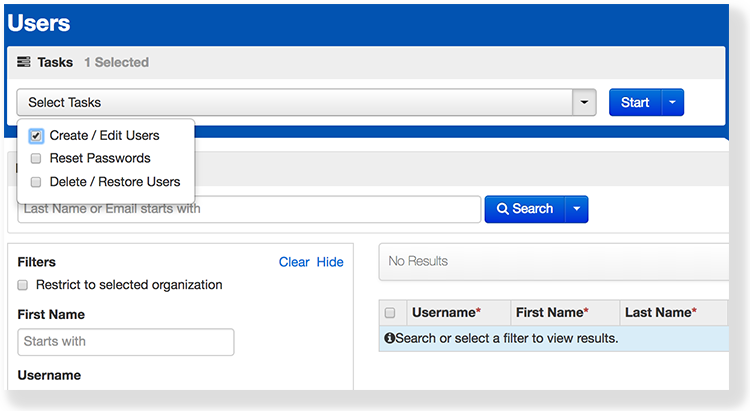
- From Setup, select Users.
|
 Image Removed
- Type a user name into the search field, and click Search.
|
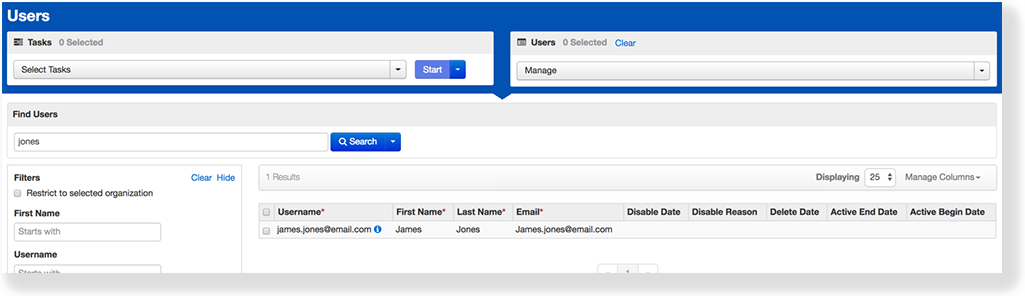 Image Added Image Added
- Click the information icon in the Username column.
|
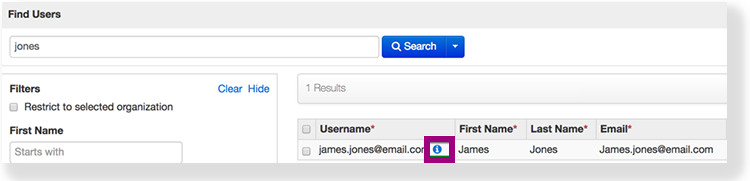 Image Added Image Added
If this column does not display, click Manage Columns, select Username, and click Apply.
|
| UI Text Box |
|---|
|
| Anchor |
|---|
Next Steps | Next StepsYou can change the username after you enter the email address, but you must do so
What's Next?
| Expand |
|---|
| title | When you enter an email address for a new user... |
|---|
|
It serves as the username. This is true even if you previously entered a different username.
The email you entered automatically populates in the Username field. To change the username, delete the user's email from the Username field and enter the desired username before you click Create. |
After you create an account, the system sends an email to the new user. If the email is returned, undelivered, the system displays an email delivery failure.