Set Up TestNav on ChromeOS
Install TestNav
Please note that Pearson supports only managed Chromebooks for secure testing. Both before you install TestNav AND prior to each testing session, you should check each device to ensure it is in managed status. For further instruction on this, see TestNav - ChromeOS Managed Devices.
To install TestNav, first ensure each device's settings are set to keep local data to avoid accidentally deleting the SRF and log files. Then, you add TestNav as a kiosk app.
Content filters and TestNav...
If your content filters are activated when a student signs in to the Chrome device, contact Pearson Support for additional URLs to add to your kiosk settings for URL blocking. TestNav does not require that the student sign in to the Chrome device. As a result, these content filters do not filter as intended during a TestNav test.
- Uninstall the legacy TestNav Chrome App.
- Install the new TestNav Web App for ChromeOS. This app is not available on the Chrome Web Store. It is installed using the Google Admin Console.
- Sign in to the Google Admin Console.
- On the left side, navigate to: Devices > Chrome > Apps & extensions
- Select the Kiosks tab at the top of the page.
- Select the organizational unit for which you want the TestNav app & extension to be added. If you want to add for all users, select the top-level organizational unit.
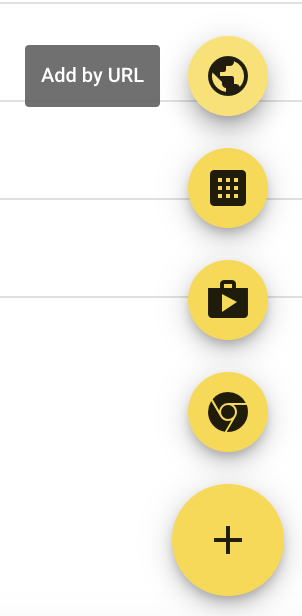
- Select the yellow + (plus) button at the bottom right corner to expand to see additional yellow buttons. Select the Add by url button and enter https://home.testnav.com/
- Select Save. Google will then prompt you to allow permissions to this app. Select Agree.
- The new TestNav Web App for ChromeOS appears in the app list.
-

- Select the TestNav app and make sure Allow App to Manage Power is disabled.

- Scroll down the right-side bar to enable Allow new windows to open (full screen).
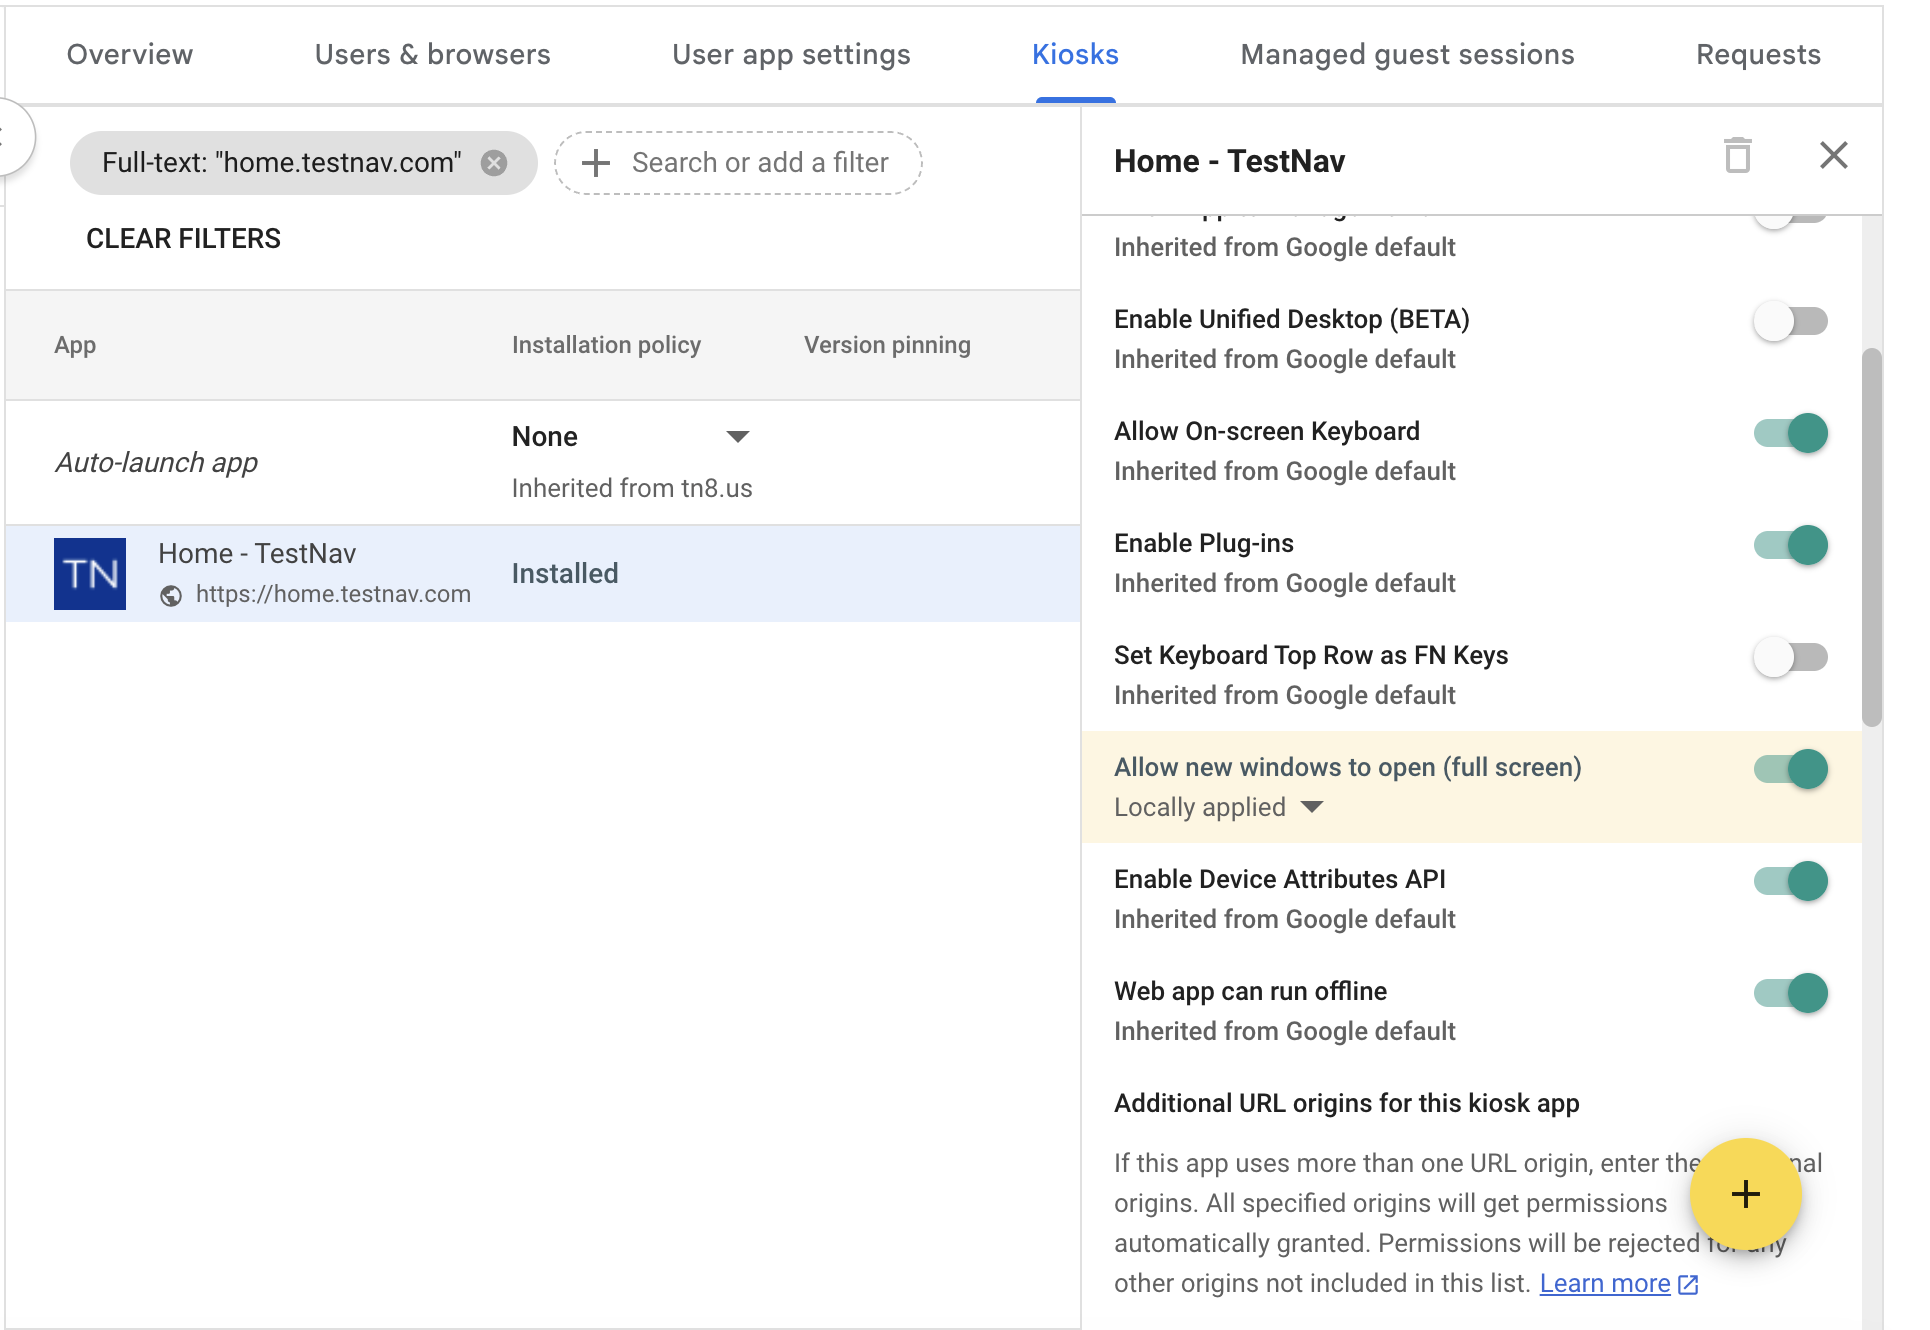
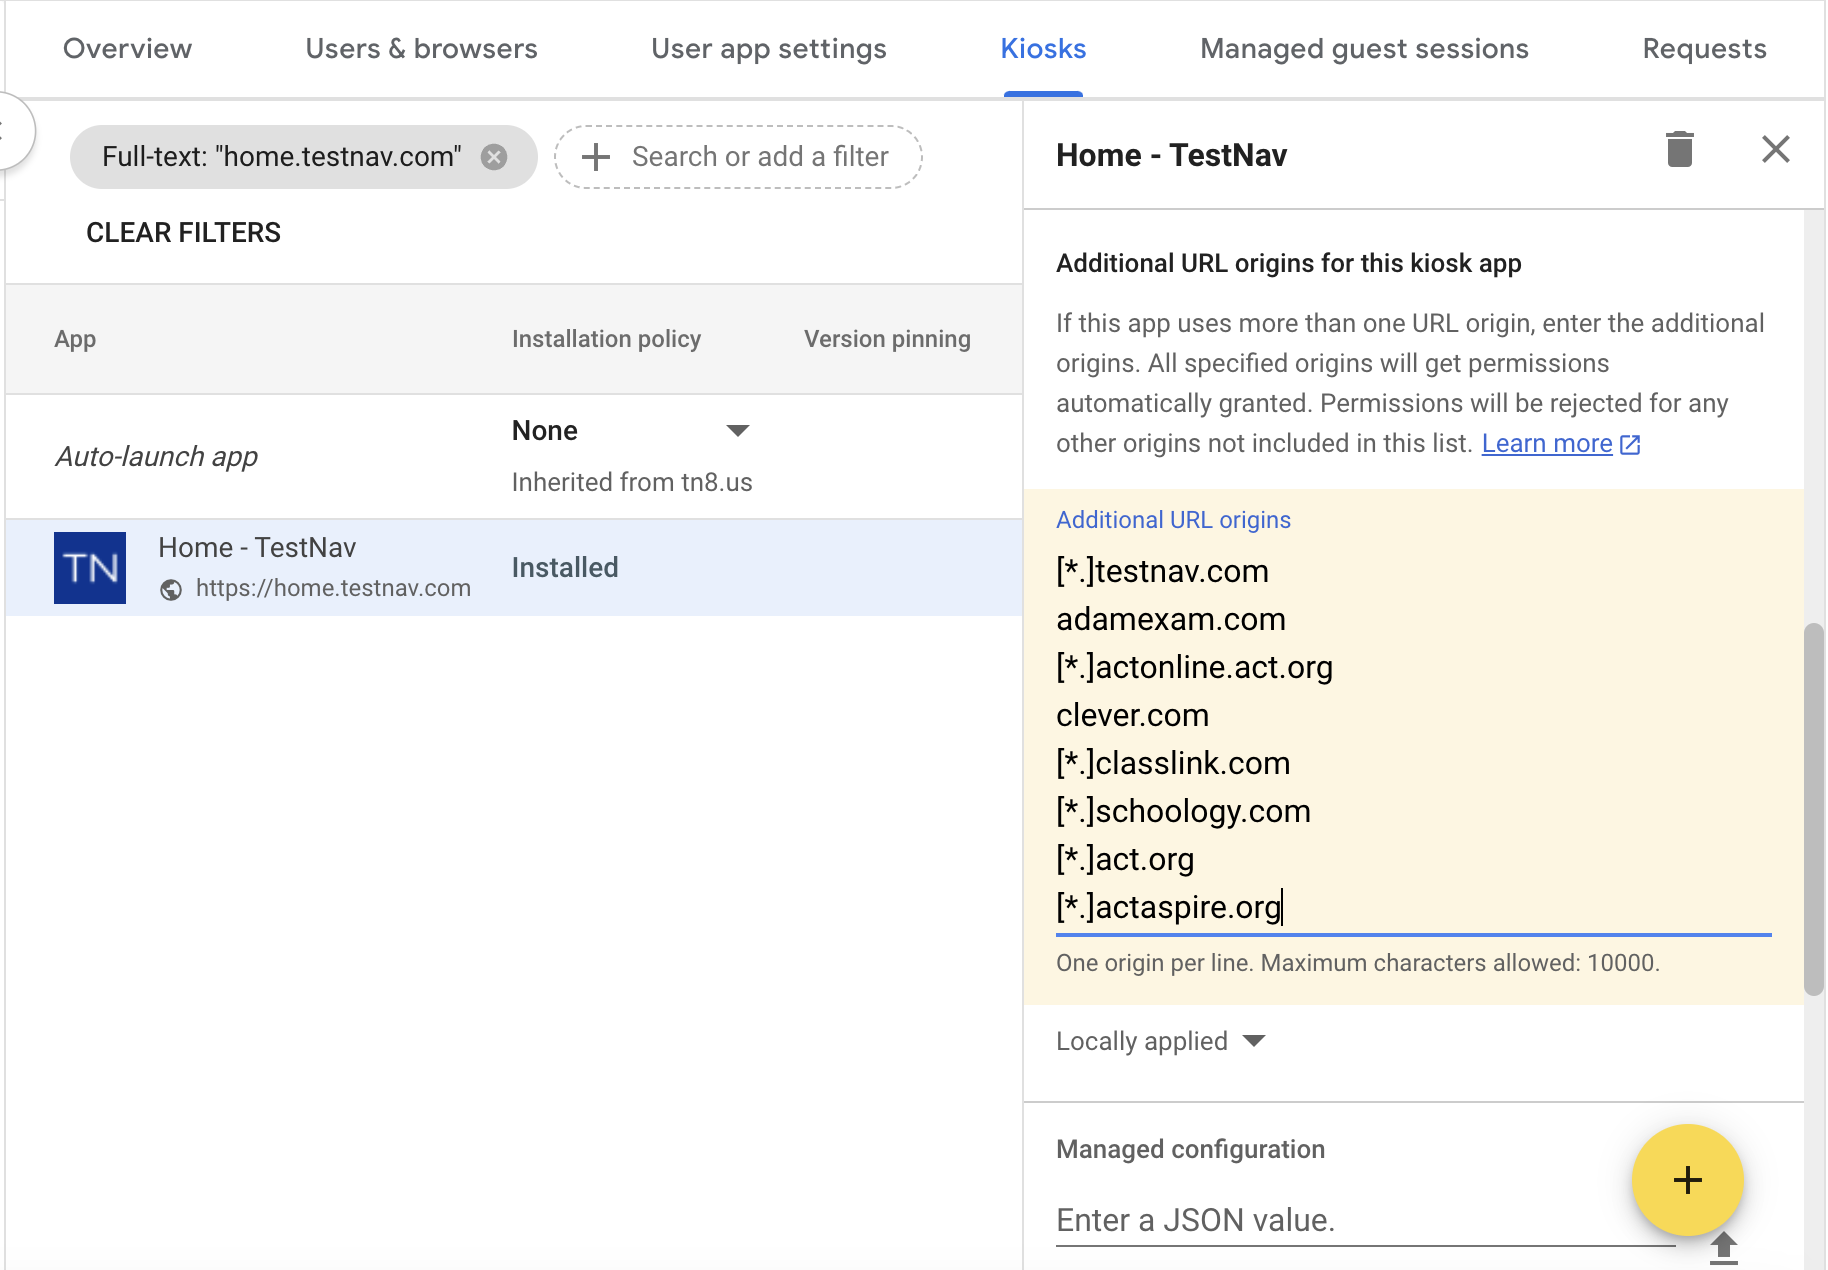
- Scroll down further on the right-side bar to Additional URL origins field to add the following URLs. Note: Additional URLs must be added to allow the TestNav Web App for ChromeOS access to functions outside of the scope of the app URL.
[*.]testnav.com
[*.]classlink.com
[*.]schoology.com
[*.]act.org
[*.]actaspire.org
- Scroll down further on the right-side bar to Extension section.
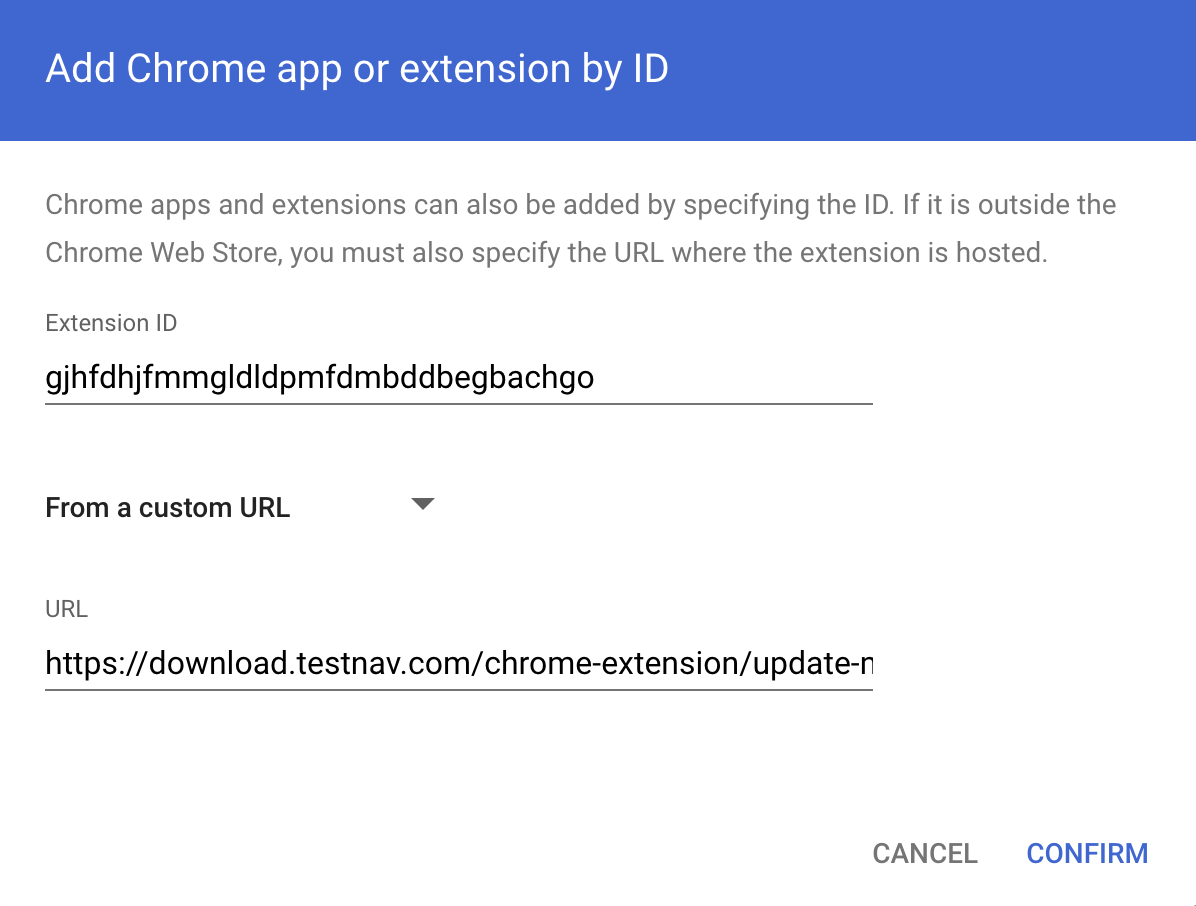
- Click ADD EXTENSION and from the pop-up list, select Add from a custom URL and the Add Chrome app or extension by ID dialog box opens.
- Select From the Chrome Web Store, which will expand the menu to show an additional selection of From a custom URL. Select From a custom URL.
- Enter the following Extension ID and the URL and then click Confirm:
- Extension ID:
gjhfdhjfmmgldldpmfdmbddbegbachgo - URL:
https://download.testnav.com/chrome-extension/update-manifest.xml
- Extension ID:
- Enter the following Extension ID and the URL and then click Confirm:
- Click the SAVE button located at the top right corner.

- The new TestNav Web App for ChromeOS and its extension will now be installed for users in the selected organizational unit as a kiosk app the next time they start their ChromeOS device.
Note on accessibility tools/accommodations...
Students with accommodations or accessibility features enabled through their PNP or test form access those features within TestNav. ChromeOS has native accessibility features that might appear within a kiosk floating accessibility menu during testing. Technology personnel should disable this menu before testing to avoid it interfering with the student’s test.
Find and Set Up Student Response File Backups
When a student responds to a test question, TestNav sends the response to the Pearson server. If the network experiences a connectivity issue, or the student encounters an error, TestNav saves the response to a saved response file (SRF). For configuration details, see: Set Up Saved Response Files (SRF).