Orgs
The Orgs section is used to manage the organizational hierarchy within ADAM. Organizations represent the entities that make up your testing program, such as states, districts, schools, or other administrative groups. This structure is used throughout ADAM for rostering, user management, reporting, and test administration.
Prerequisites
Before creating an organization, ensure:
- You have the appropriate administrative permissions.
- The parent organization already exists if the new organization will be placed within an existing hierarchy.
- You know the organization's name, identifier/code, and organization type.
- Any required district, state, or program codes have been provided by your testing program administrator.
Search Organizations
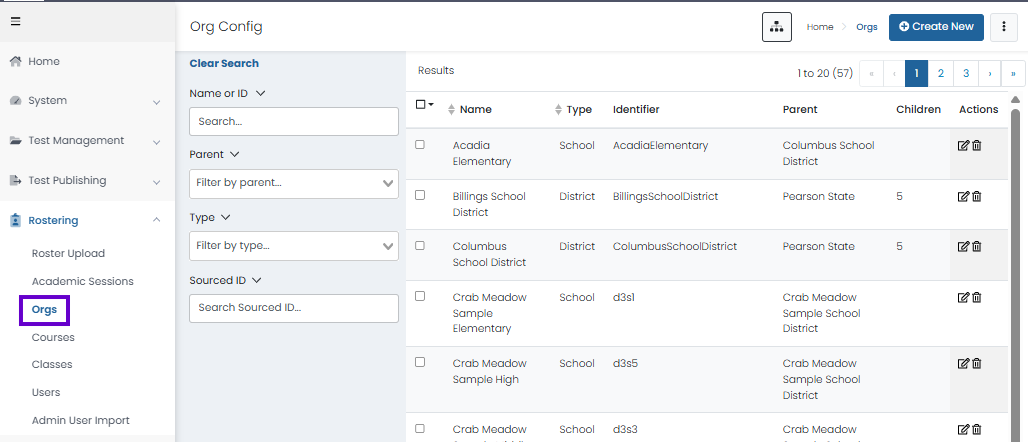
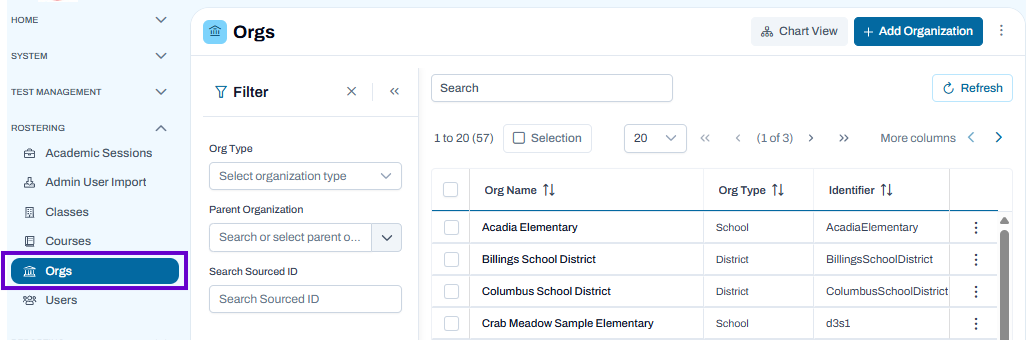
Search, filter, view, and manage organizations within the system, including editing details and navigating organizational hierarchies
NOTE: For most customers, organizations are loaded through LaunchPad and should not be added in ADAM. Please work with your program delivery team to add or edit Organizations.
Classic User Interface:
Updated User Interface:
View Organization Hierarchy
CLASSIC USER INTERFACE FUNCTIONALITY
To view the hierarchy of organizations, navigate to Rostering > Orgs and then select the Org Explorer icon. Selecting the View button in the hierarchy view navigates the user to the Org Config Edit/View page.
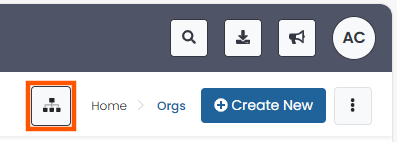
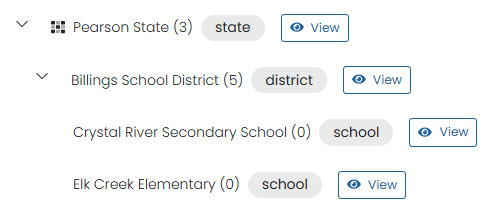
Select an Org name to expand the list. The number in parenthesis indicates the number of child institutions. Select View to see organizational details.
UPDATED USER INTERFACE FUNCTIONALITY
To view the hierarchy of organizations, navigate to Rostering > Orgs and then select the Chart View icon.
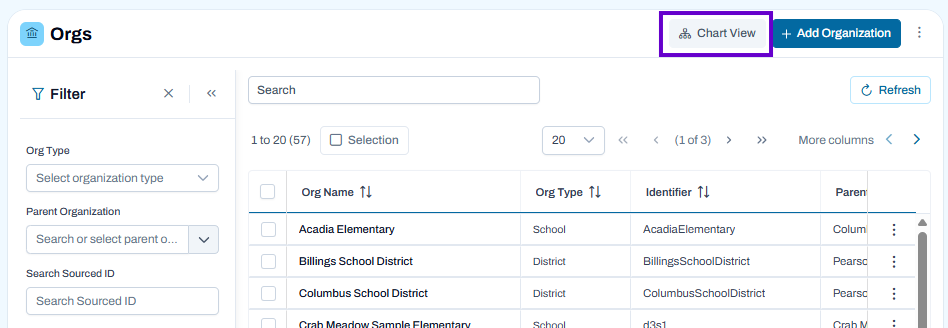
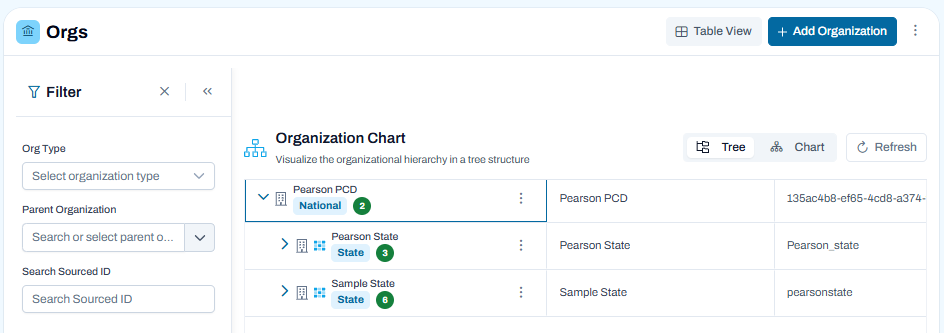
Selecting the Chart View button navigates the user to the Organization Chart view. Here you have the option to view organizations in either a Tree or Chart View.
Add Organization
Use the Add Organization page to create a new organization within your ADAM hierarchy. Organizations typically represent districts, schools, or other administrative entities that will be used for user management, rostering, testing, and reporting.
Prerequisites
Before adding an organization:
- You must have permission to manage organizations.
- Any parent organization (such as a district or state) should already exist.
- You should know the organization's name, type, and unique identifier.
- Required organizational codes or identifiers should be available, if applicable.
To Add an Organization
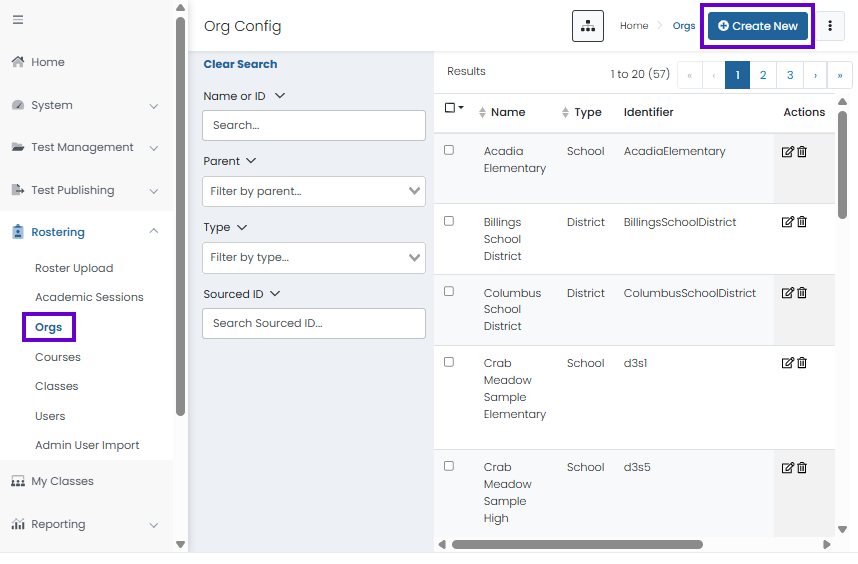
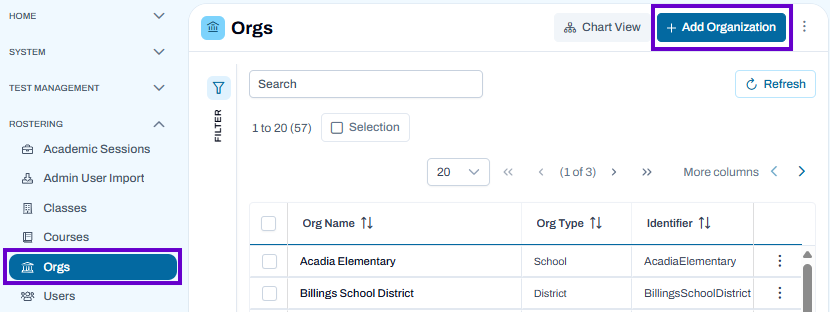
- Navigate to Rostering > Orgs.
- Select Add Organization.
General
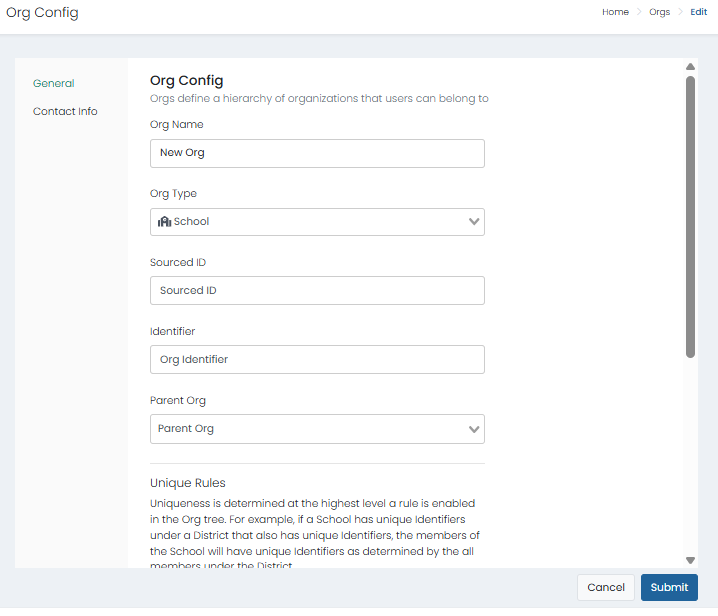
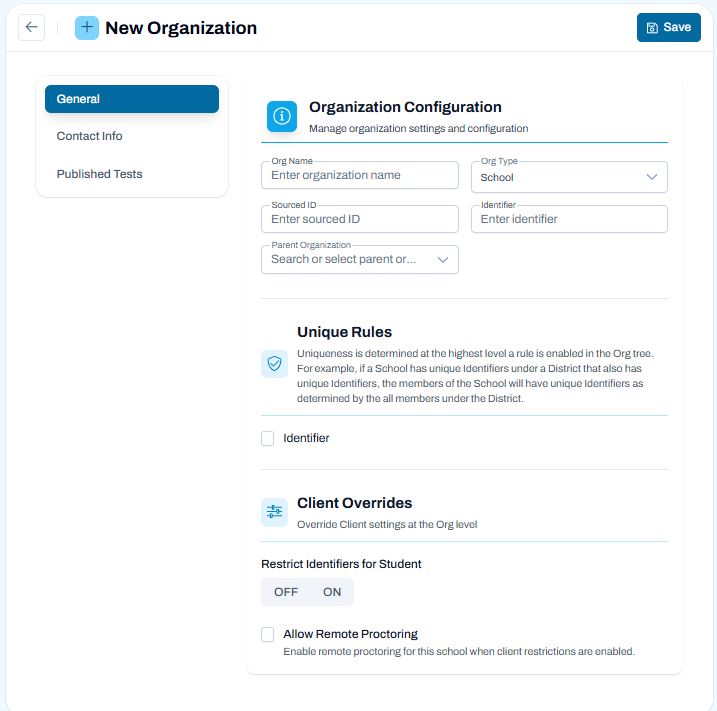
Complete the required organization information:
- Org Name – Enter the organization's display name.
- Org Type – Select the appropriate organization type, such as School or District.
- Sourced ID – Enter a source identifier if required by your organization.
- Identifier – Enter the organization's unique code or identifier.
- Parent Organization – Select the organization that will sit above this organization in the hierarchy.
- Complete any additional fields required by your testing program.
- Review the information for accuracy.
- Save the organization.
Classic User Interface:
Updated User Interface:
Configure Unique Rules
The Unique Rules section controls how identifier uniqueness is enforced within the organizational hierarchy.
- Identifier – Enable this option to enforce unique identifiers according to the hierarchy level rules defined for your program.
- When enabled, identifiers must be unique within the scope established by the parent organization.
Configure Client Overrides
Client Overrides allow organization-specific settings to override default program settings.
Restrict Identifiers for Student
Use this setting to determine whether student identifiers are restricted according to organization-specific requirements.
- OFF – Default identifier rules apply.
- ON – Additional identifier restrictions are enforced for students within this organization.
Allow Remote Proctoring
Enable Allow Remote Proctoring to permit remote proctoring for this organization when client restrictions support remote testing.
Contact Information
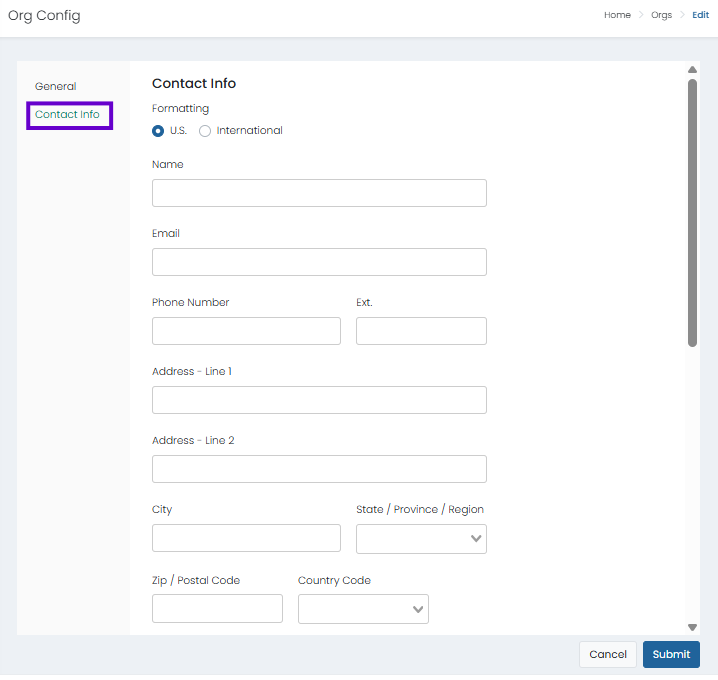
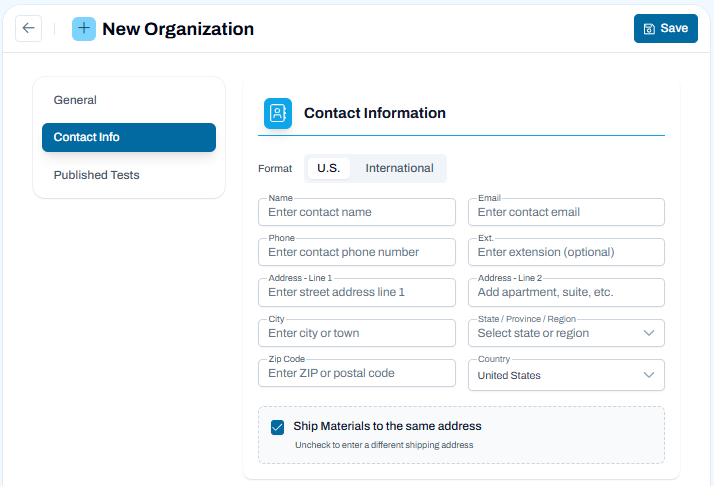
Use the Contact Info tab to enter the organization's primary contact and address information. This information is used for communication, administration, and, when applicable, shipping testing materials.
Enter Contact Details
- Select the appropriate address format:
- U.S. for United States addresses.
- International for addresses outside the United States.
- Complete the contact fields:
- Name – Enter the primary contact person's name.
- Email – Enter the contact email address.
- Phone – Enter the primary contact phone number.
- Ext. – Enter an extension number if applicable.
Enter Organization Address
Provide the organization's physical address:
- Address Line 1 – Enter the street address.
- Address Line 2 – Enter additional address information such as a suite, building, or apartment number (optional).
- City – Enter the city or town.
- State / Province / Region – Select the appropriate state, province, or region.
- Zip Code – Enter the ZIP or postal code.
- Country – Select the appropriate country.
Shipping Materials
By default, Ship Materials to the same address is selected.
- Leave this option selected if testing materials should be shipped to the address entered above.
- Clear the checkbox if materials should be shipped to a different address. Additional shipping address fields will become available.
Classic User Interface:
Updated User Interface:
Published Tests - Updated User Interface Only
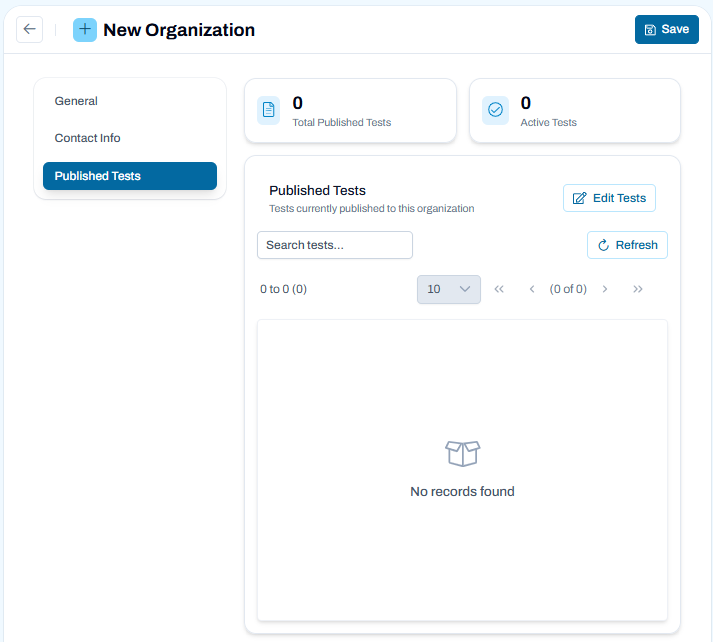
Use the Published Tests tab to view and manage the tests that are available to the organization. Published tests can be assigned to students, included in test administrations, and used during testing activities within the organization.
View Published Tests
The Published Tests page displays:
- Total Published Tests – The total number of tests available to the organization.
- Active Tests – The number of currently active published tests.
- A list of tests that have been published to the organization.
Use the Search field to locate a specific test and Refresh to update the list with the latest information.
Publish Tests to the Organization
- Select Edit Tests.
- Review the list of available tests.
- Select the tests that should be available to the organization.
- Save your changes.
The selected tests will be published to the organization and can be used for future test administrations.
Remove Published Tests
If supported by your program permissions:
- Select Edit Tests.
- Clear the selection for tests that should no longer be available.
- Save your changes.
Removing a published test prevents it from being used for new testing activities within the organization.
Important Notes
- Tests must be published to an organization before they can be scheduled in a test administration.
- The tests available for selection depend on your program configuration and user permissions.
- Publishing a test makes it available to users and students associated with the organization.
Updated User Interface:
Save the Organization
After completing all required fields:
- Review the organization settings and hierarchy assignments.
- Select Save.
- Verify that the organization appears in the Orgs list and is positioned correctly within the organizational hierarchy.
After Creating an Organization
Once an organization has been created, it can be used to:
- Associate users with a district or school.
- Roster students, teachers, classes, and courses.
- Support test administration and proctoring activities.
- Organize reporting and assessment results by district or school.
Best Practice
Create and verify your organizational hierarchy before importing users, creating classes, or rostering students to ensure records are assigned to the correct organization from the start.
Edit an Organization
Use the Edit option to update an existing organization's settings, contact information, or published test assignments.
To Edit an Organization
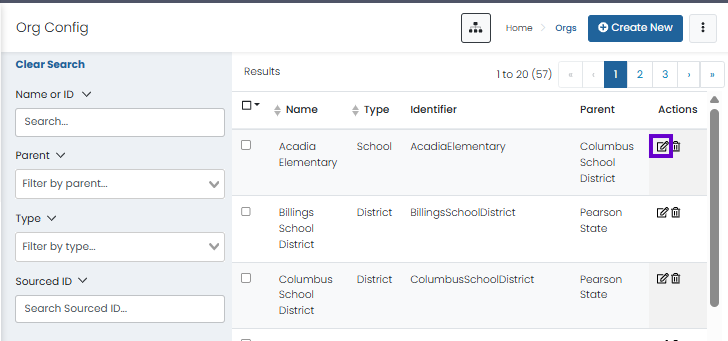
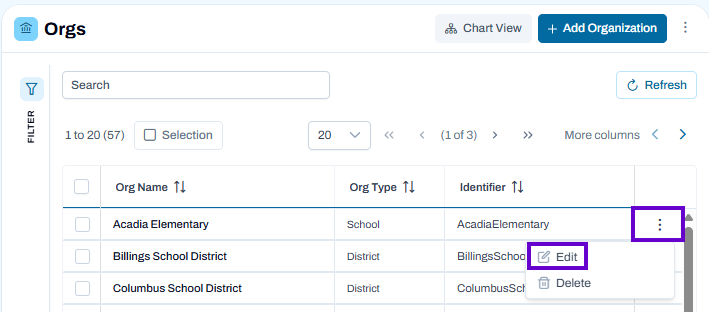
- Navigate to Rostering > Orgs.
- Locate the organization you want to modify.
- Select the Actions menu (⋮) for that organization.
- Select Edit.
- Update the organization's information as needed using the available tabs:
- General – Modify organization details, hierarchy assignments, and configuration settings.
- Contact Info – Update contact names, addresses, phone numbers, and shipping information.
- Published Tests – Manage which tests are available to the organization.
- Select Save to apply your changes.
Classic User Interface:
Updated User Interface:
Editing Organization Details
Within the General tab, you can update:
- Organization name
- Organization type
- Identifier and sourced ID
- Parent organization
- Organization-specific settings and overrides
Note: Changes to organization hierarchy or identifiers may affect user assignments, rostering data, reporting structures, and testing configurations.
Managing Published Tests
Use the Published Tests tab to add or remove tests available to the organization. Published tests can then be used when creating test administrations for users within that organization.
Deleting an Organization
If available, the Delete option removes the organization from ADAM.
Before deleting an organization:
- Verify the organization is no longer needed.
- Review any associated users, students, classes, or testing records.
- Ensure deleting the organization will not impact active testing or reporting activities.
Important: Depending on your program configuration, organizations with associated data may not be eligible for deletion.
Best Practice
Review organization settings carefully before saving changes, especially when modifying identifiers, parent organizations, or published test assignments, as these changes can affect users and testing activities throughout the organization hierarchy.
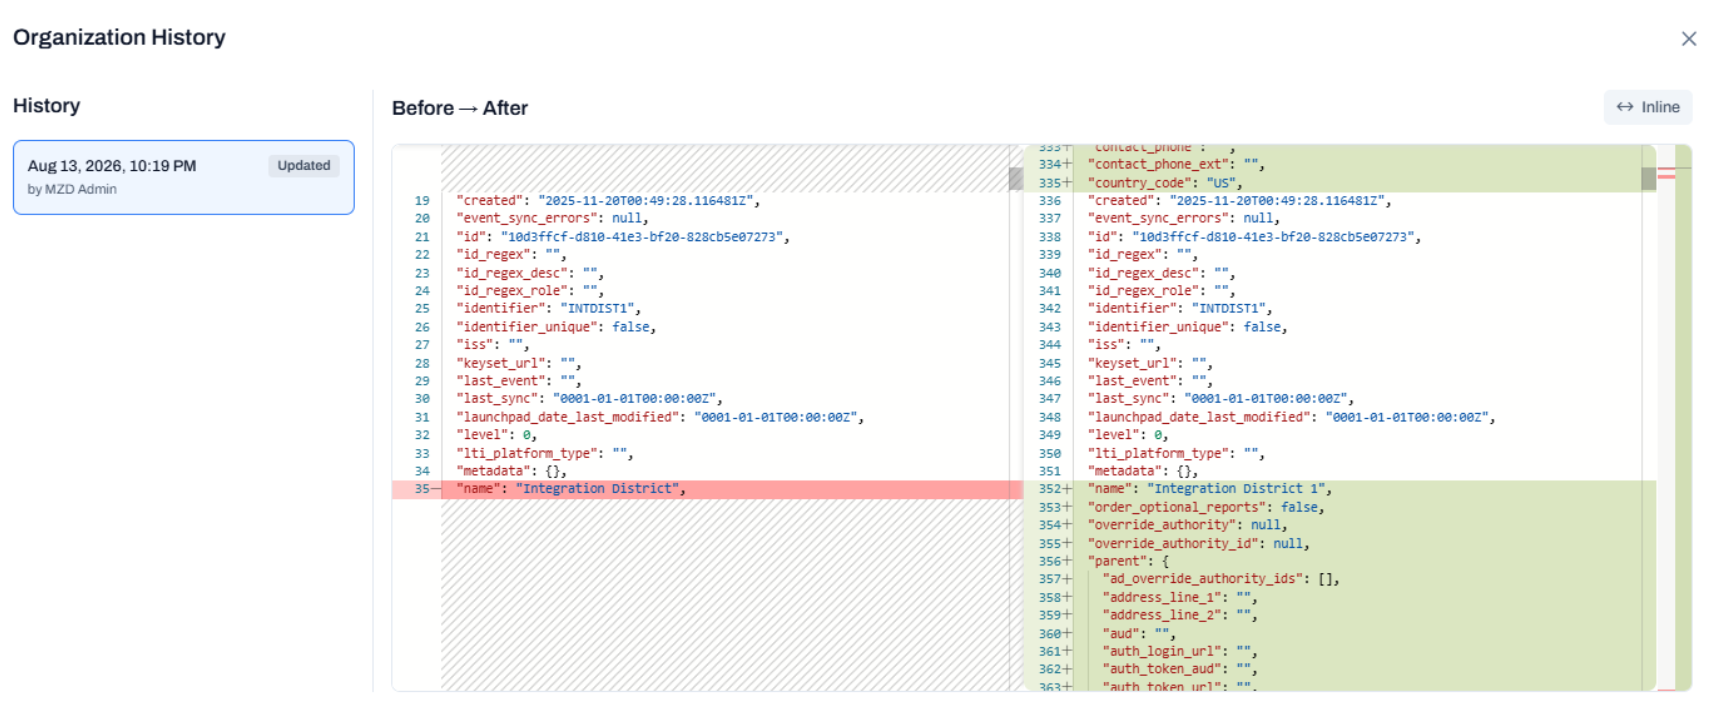
View Organization History - Updated User Interface Only
Authorized users can review the full history of organization changes in ADAM, including creations, updates, and deletions. You will only be able to review this history if this permission is configured for your role.
Updated User Interface: