NEW USER INTERFACE ONLY:
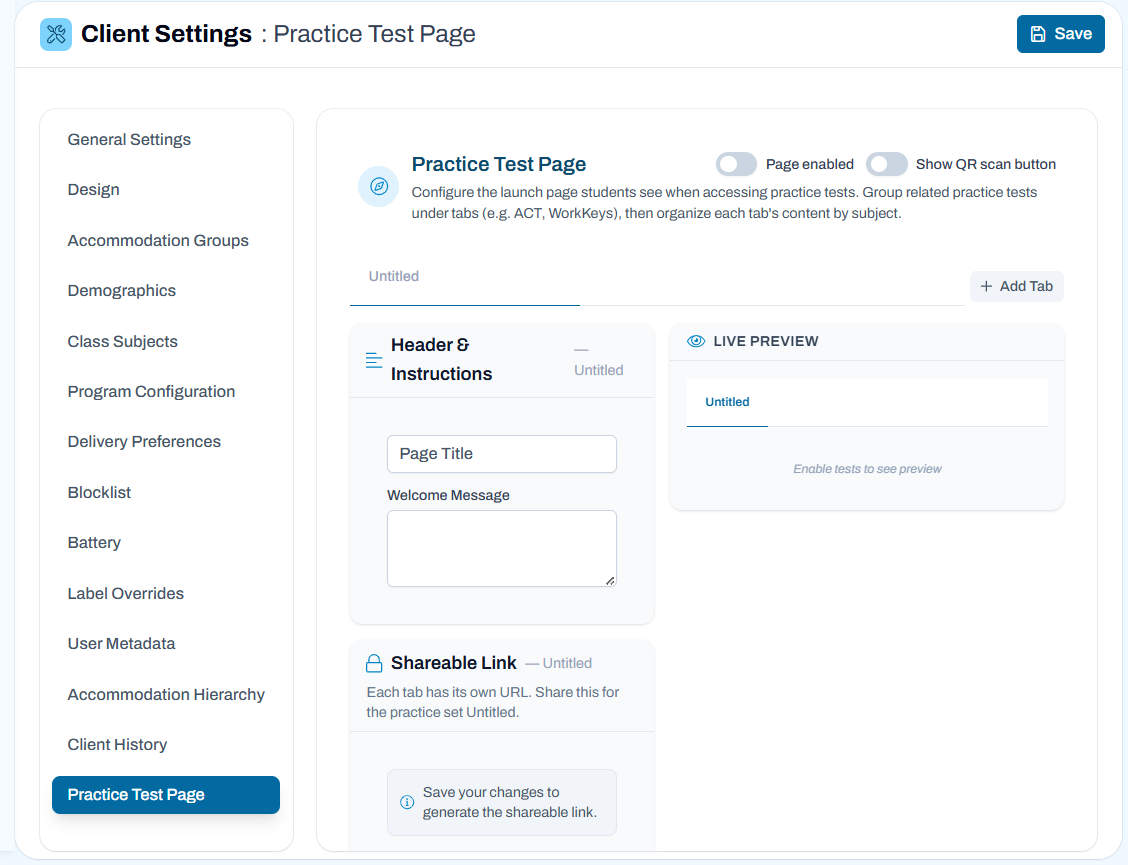
The Practice Test Page allows administrators to create and manage the landing page students see before accessing practice tests. Content can be organized into tabs and subject sections, making it easier for students to locate and launch available practice tests.
Using the Practice Test Page
- Navigate to Client Settings > Practice Test Page.
- Enable the page using the Page Enabled toggle if you want the customized practice test page to be available to students.
- Enable the Show QR Scan Button toggle if you want to show the Scan QR Code button on the Practice Test landing page.
- Enter a Page Title and Welcome Message in the Header & Instructions section.
- Add any additional guidance for students in the Instructions field.
- Select Add Tab to create separate tabs for different groups of practice tests (for example, ACT, WorkKeys, or grade levels).
- Within each tab, select Add Subject Section to organize tests by subject area.
- Configure the content for each subject section and associate the appropriate practice tests.
- Use the Live Preview panel to review how the page will appear to students.
- Save your changes. Once saved, a Shareable Link is generated for the selected tab, which can be distributed to users as needed.
- Select Save to publish your updates.
Tip: Organizing practice tests into tabs and subject sections helps students quickly locate the correct practice tests and reduces navigation confusion.
Tiny Link: https://support.assessment.pearson.com/x/wQIWDw