The Admin User Import page allows administrators to create multiple user accounts at once by uploading a CSV file. This feature is useful for adding large numbers of users without creating each account individually.
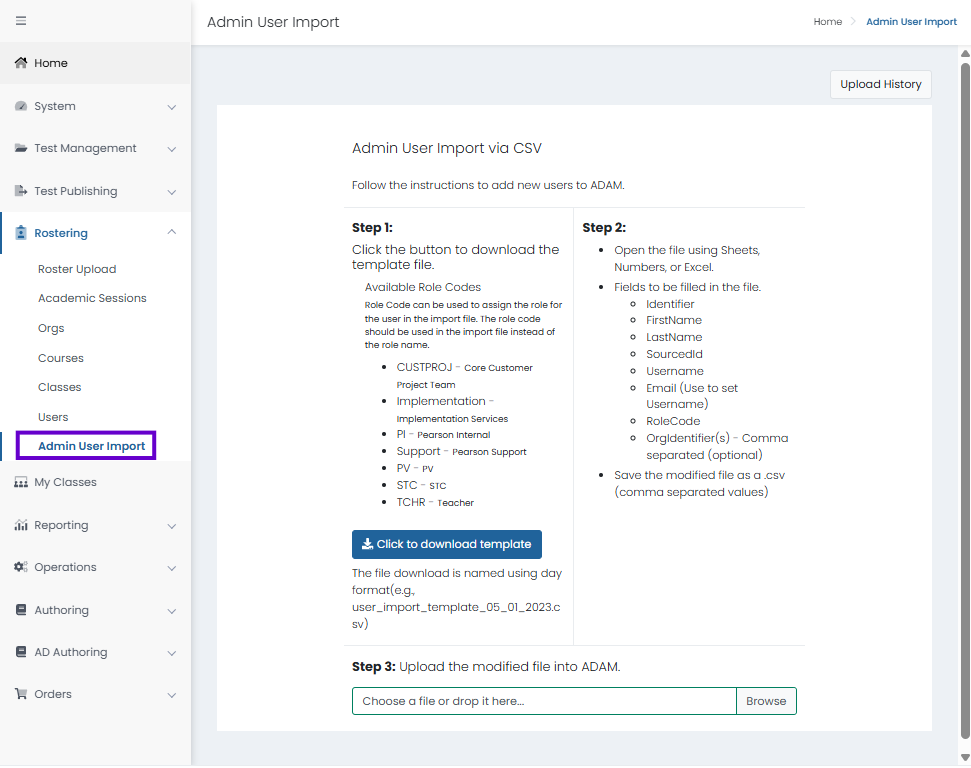
Classic User Interface:
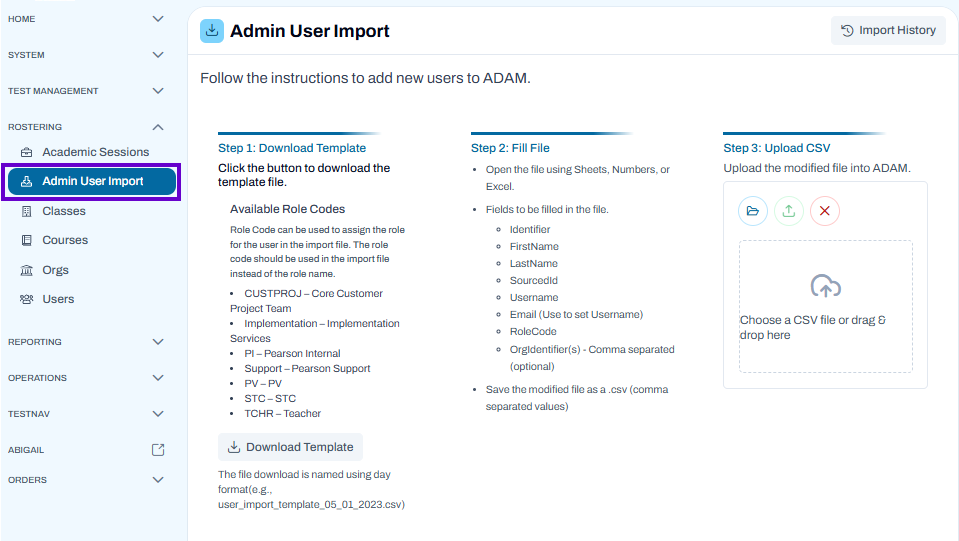
Updated User Interface:
Step 1: Download the Template
- Navigate to Rostering > Admin User Import.
- Select Download Template.
- Save the CSV template to your computer.
- Review the available role codes listed on the page to determine the appropriate role for each user.
Step 2: Complete the Template
- Open the downloaded CSV file in Excel, Google Sheets, Numbers, or another spreadsheet application.
- Enter the required information for each user, including:
- Identifier
- First Name
- Last Name
- Sourced ID
- Username
- Email (used to set the username if applicable)
- Role Code
- Org Identifier(s) (comma-separated if assigning multiple organizations)
- Ensure all required fields are completed and the data is accurate.
- Save the completed file as a CSV (.csv) file.
Step 3: Upload the CSV File
- In the Upload CSV section, select the Browse icon or drag and drop the CSV file into the upload area.
- Verify the correct file has been selected.
- Start the import process.
- Review any validation messages or errors and correct them if necessary.
View Import History
- Select Import History to review previous user imports.
- Check the status of completed imports and investigate any import errors or warnings.
Best Practices
- Always start with the provided template to ensure the correct file format.
- Verify role codes and organization identifiers before uploading.
- Check for duplicate usernames, email addresses, or sourced IDs.
- Review import results after uploading to confirm all users were created successfully.
Tiny Link: https://support.assessment.pearson.com/x/dYAsDw