Install TestNavTestNav program files are saved in Applications/TestNav. Download TestNav. Double-click the .dmg file (for example, testnav-1.4.1.dmg) that you downloaded. The TestNav install window appears.
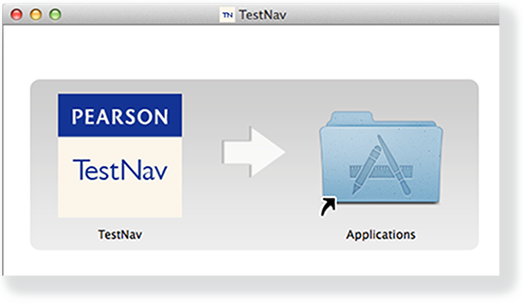
- Drag the TestNav icon into the Applications folder.
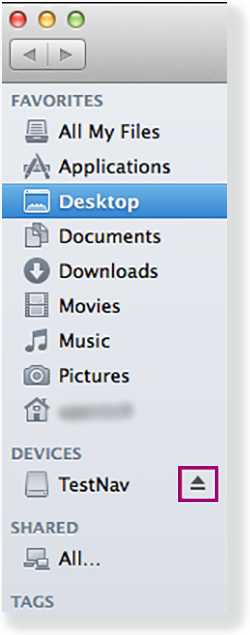
Eject the TestNav installer from Devices in the Finder sidebar. You can also eject it from the Desktop.
TestNav App UpdatesTestNav program file updates are saved in {user_home}/Library/Application Support/Pearson. You must give students write access to the update directory. 
|
You can copy the TestNav application and push it to student computers for mass installation. For macOS 10.14+, you must grant TestNav full privacy & accessibility control to administer secure tests. Click or tap System Preferences > Security & Privacy > Privacy. Scroll to Accessibility, and add or select TestNav.
|

Prepare Macs for Screen Reader Users
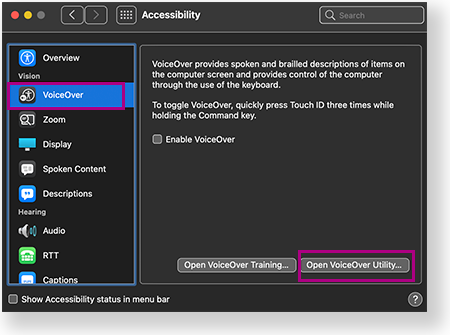
Before signing in, deselect Show Caption Panel in the Accessibility settings for VoiceOver use during a TestNav test:
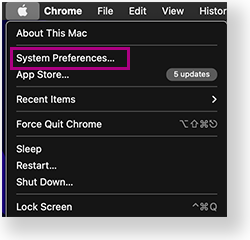
- Go to System Preferences > Accessibility.
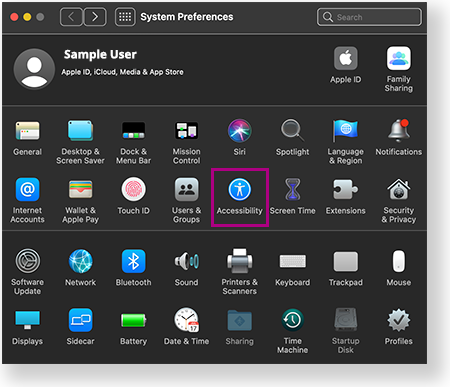
- Select VoiceOver > Open VoiceOver Utility.
- Select Visuals > Panels and Menus, and then deselect Show Caption Panel.
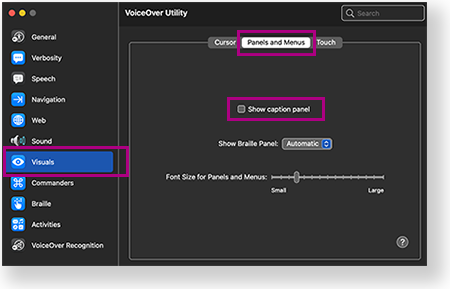
| If Show Caption Panel is selected, the Caption Panel appears during a secure test. This triggers an error and TestNav exits the student from the test. |
Student Response File Setup
When a student responds to a test question, TestNav sends the response to the Pearson server. If the network experiences a connectivity issue, or the student encounters an error, TestNav saves the response to a saved response file (SRF). For configuration details, see: Set Up and Find Saved Response Files (SRF).
Run App Check
It is essential to run the App Check on each student device before testing. For details, see App Check.
Sign in to TestNav
Start a test to ensure that you can do so without error. For details, see the instructions in Sign in to TestNav.

Tiny Link: https://support.assessment.pearson.com/x/JAAyAQ


