Create a New Administration
Before You Begin
Before creating an administration, the assessment must be published and available in ADAM. See also: Tests: Create a Test; Test Publishing
Requirements
- Each assessment requires its own administration. Administrations are used to schedule tests for students.
- See also: Administrations
- Students who will take the assessment must already exist in ADAM and be assigned the Student role.
- The exception is when Add Temporary Students is enabled; see Administrations: Create and Merge Temporary Students.
- See also: Rostering; Student Dashboard; Modify Eligibility
- Some assessments include predefined access settings that cannot be modified.
Creating an Eligibility-Based Administration
Eligibility-based administrations allow students to be rostered for testing regardless of whether they are enrolled in a class. When configuring the administration, you will define the criteria used to identify eligible students.
Proctor Group Setup
After an eligibility-based administration is created, proctor groups can be managed in one of two ways:
Option 1: Create Proctor Groups on Test Day
Proctors can sign in to ADAM on the day of testing and create their proctor groups as needed. Students receive the test code directly from the proctor during the testing session.
Test Cards include:
- Student login credentials
- No test code
Option 2: Pre-Create Proctor Groups
School administrators can create proctor groups in advance of testing.
Test Cards include:
- Student login credentials
- Test code
Pre-creating proctor groups can simplify test-day setup by providing students with all required login information before testing begins. If you don't pre-create proctor groups, Test Cards will contain student login credentials but not the test code. Students will receive the test code from the proctor.
Available Criteria
The criteria for finding the eligible student can be based on (and should be added in this order):
Organization: The organization can be at any organization level (based on your authority). Students are required to be associated with a school, schools with a district, districts with a state, and state with national.
Course: Narrow by course enrollment, such as Algebra I. Depending on how course codes are created in your rostering system, you may need to add multiple courses, especially if each school creates their own (for example, Algebra 2 and Algebra II).
Grade: Select the grade(s) that the students must be in (or not in) to take the administration. Students without a set grade level in ADAM are not eligible.
- Accommodations: Include students based on their assigned accommodations.
- Test Assignment Tags: Can be used when courses are not loaded or the assignments are not strictly course or grade-based. See also: Users: Assignment Tags.
Use these criteria in tandem with AND/OR and IN/NOT IN to control eligibility.
Create a New Administration
1. Go to Test Management > Administrations.
2. Select Administer New.
3. In the Test Selection screen:
Test: Select the test you want to administer.
Administration Name: Enter a name for the administration. This can be a repeat of the test name and will appear on the Administration Card.
Administration Type: if this field is visible, select 'Operational' unless directed otherwise. 'Validation' is used for system testing and results will be excluded from reporting.
Details: Enter any additional notes.
4. Select Next.
5. In the Access Settings screen:
Secure Access: Select Kiosk Only if the administration requires students to use the secure browser.
Show All Rubric Content: If this field is available, select the checkbox to display the rubric to the student.
Org: Select an organization to limit access to the Administration Card. Typically, this is the same organization used in a later step to determine student eligibility.
Access Window: Select the time zone, start/end dates, and (optionally) the day start/end times for the administration.
Teacher Scoring: By default, the ability for teachers and other roles to do hand scoring and the scoring window is set at the test level. When enabled at the test level, this settings at the administration level allows for more granular control over when scoring is allowed and by which user roles. See also: Tests: Create a Test (Test Config section).
6. Select Next.
7. In Data Access:
- Auto Reseat: Select Auto Reseat to allow students to sign back in after exiting a test without requiring a proctor to reseat them. This can be useful in situations such as an internet disruption. This setting can only be changed if it is configured as Allow or Defer at the test level. Note for TestNav tests: When Auto Reseat is enabled, selecting Exit Session sends the student's PNP information to TestNav. However, accommodation updates are not reviewed during the automatic resume process. If a student's accommodations are changed after testing has started, a proctor must manually exit the student's test session. Once the test status changes to EXITED and the TestNav status changes to Reseat, the updated accommodations will be sent to TestNav, as applicable.
- Disable Autosubmit: If selected, sessions will not be automatically submitted at any time.
- Feature Settings (if configured)
- Allow Multiple Attempts: If configured for your program, selecting this will allow multiple attempts for the administration. Each attempt creates a distinct session record with its own unique ID. Prior session history is preserved. Reports consider only the latest result when aggregating.
- Additional Dates: If configured for your program, enables additional date settings for the administration.
8. Select Next.
9. In the Select Students By menu, choose 'Eligibility Criteria.'
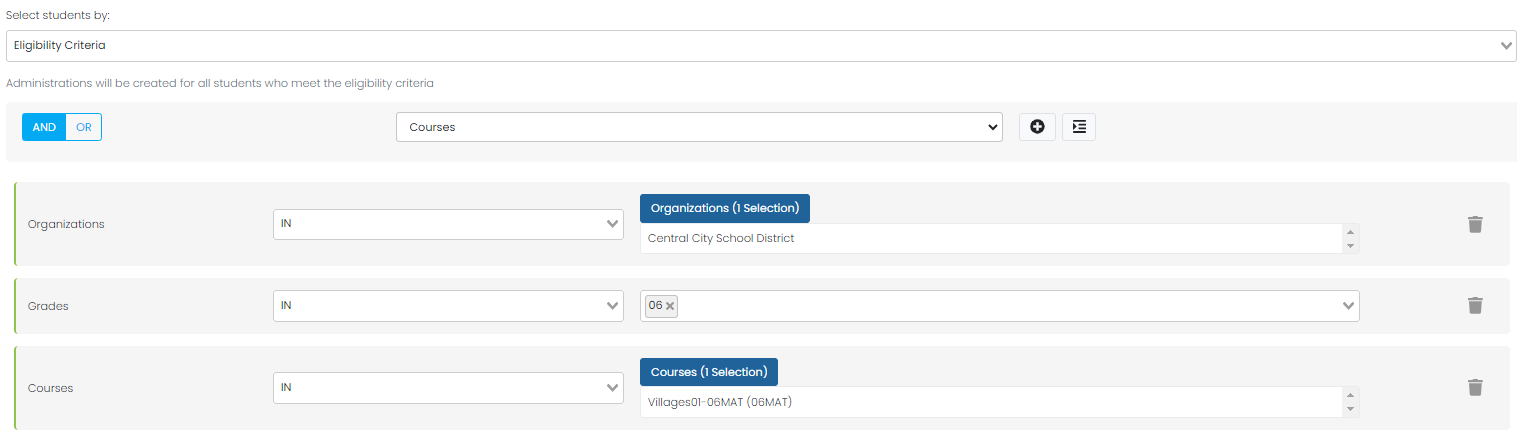
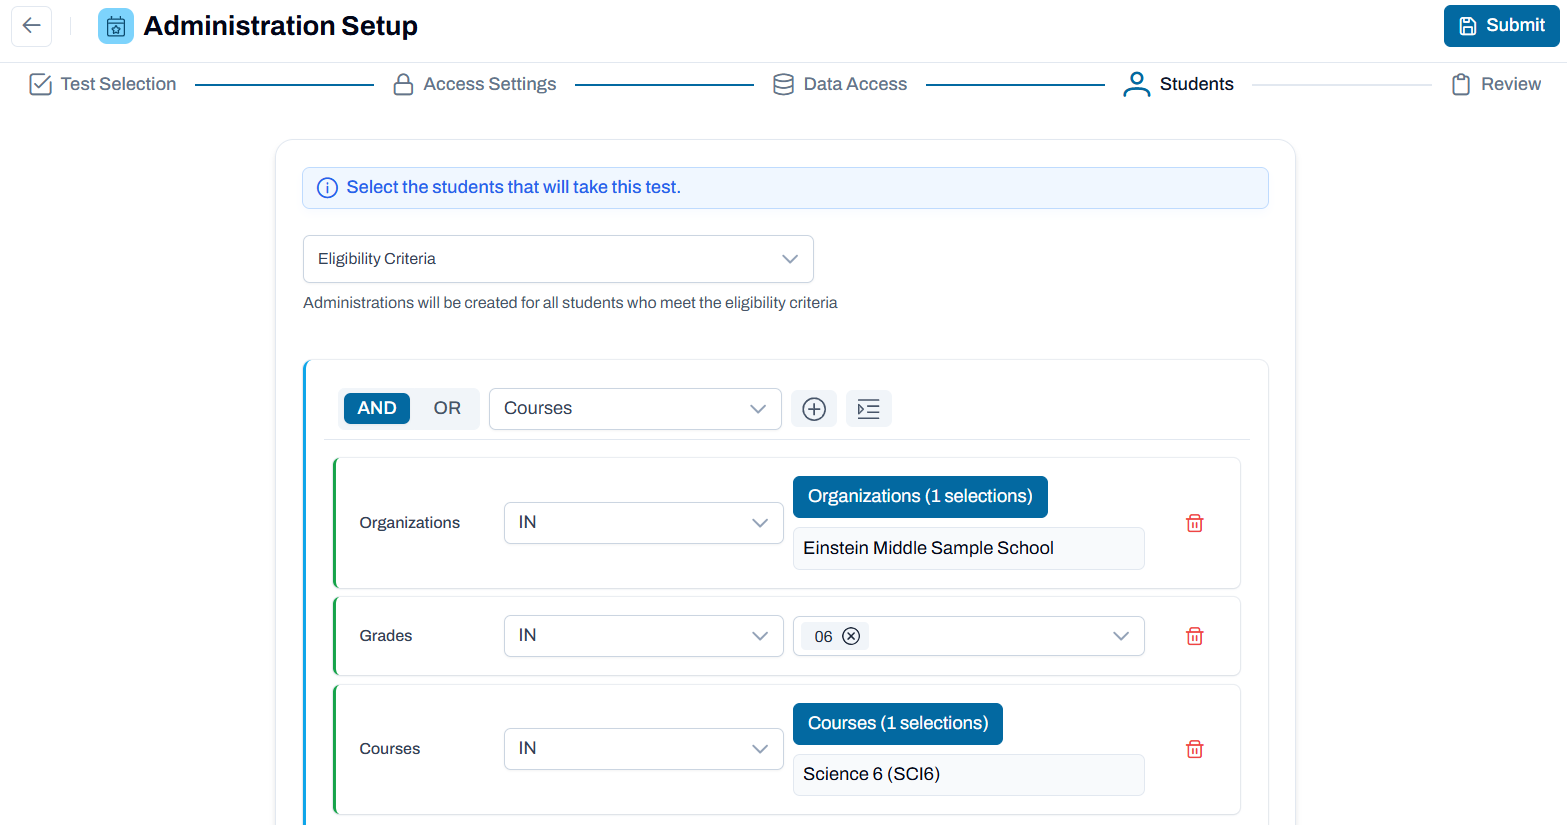
10. Start with the first criteria: always select Organization first and then select +.
Classic User Interface:

Updated User Interface:

11. Select add icon and then select the blue Organizations button.
Classic User Interface:

Updated User Interface:
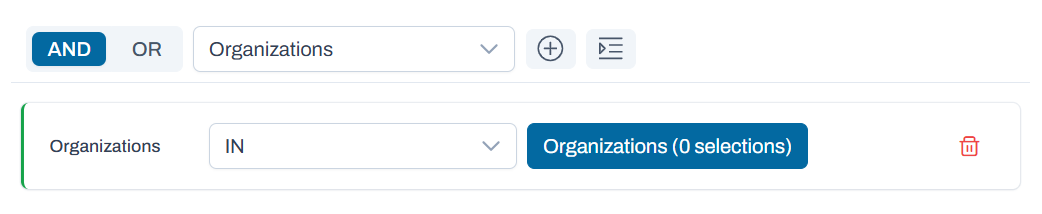
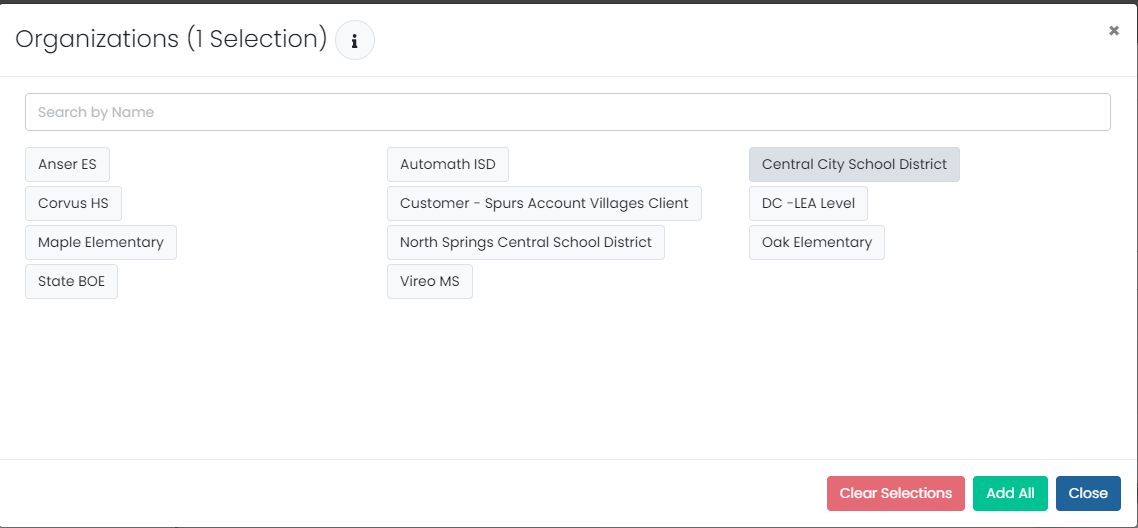
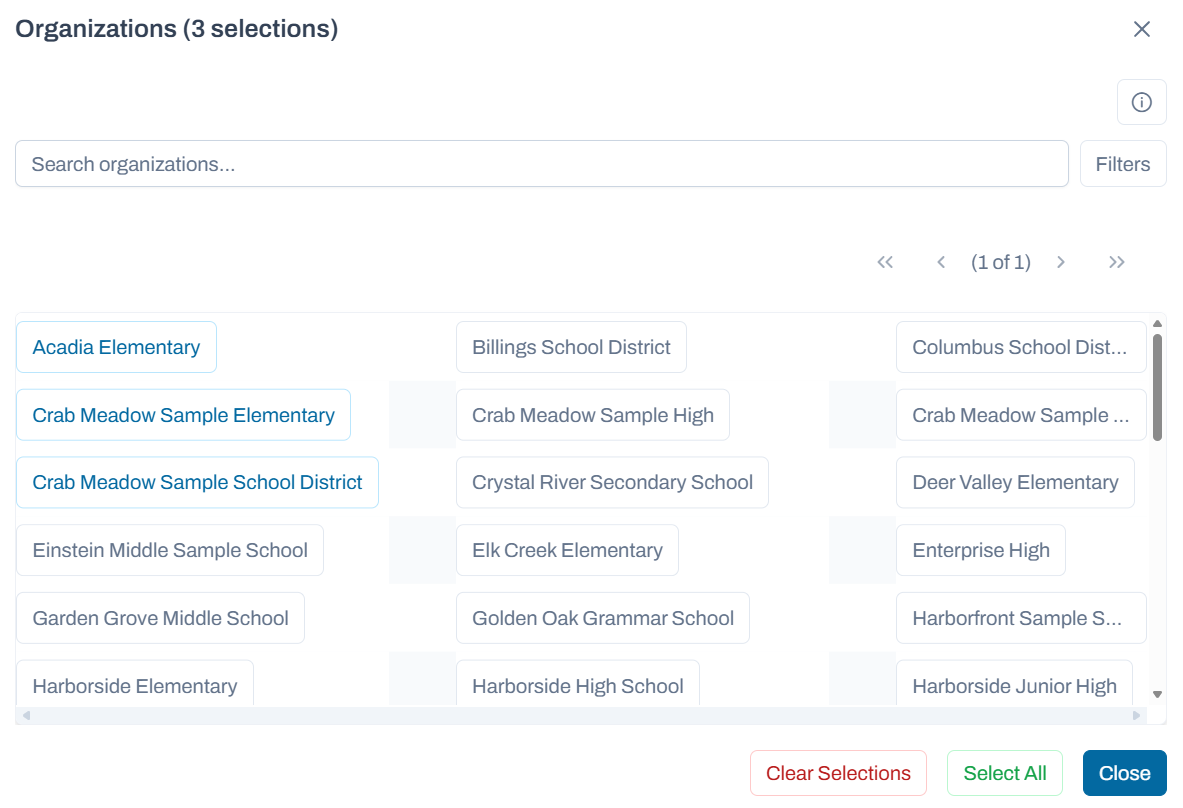
12. Highlight the top-level organization(s) of the students. They are selected when they appear in blue text and outline.
Classic User Interface:
Updated User Interface:
13. Select Close.
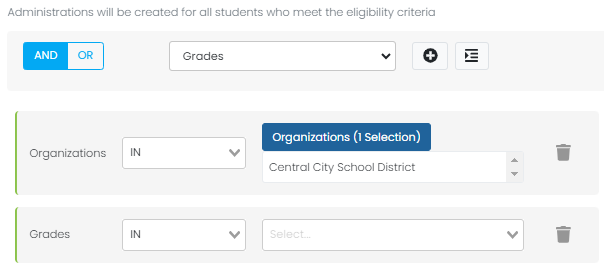
14. Now change the 'Organizations' selection to 'Grades' and then select the add icon.
Classic User Interface:
Updated User Interface:
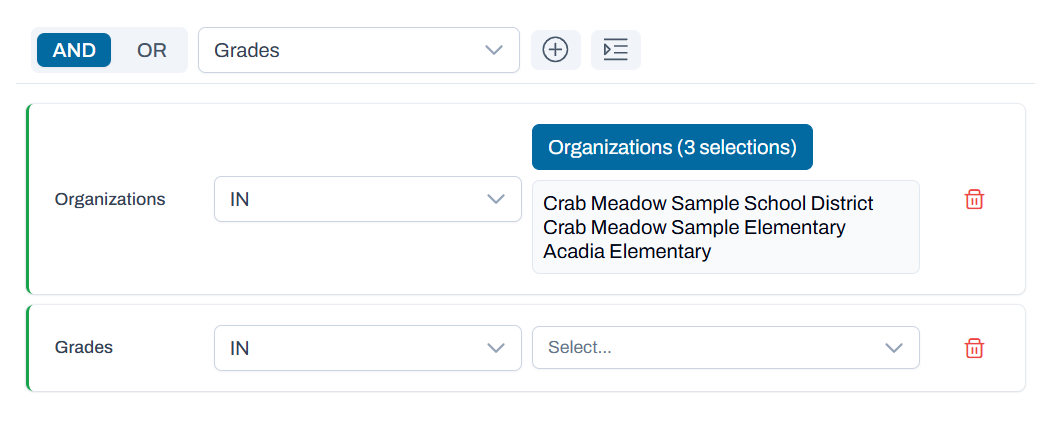
15. In the new Select menu for Grades, select one or more grade levels. This is required even if you are including course(s).
16. If you want to further limit by course(s), change the Grade selection to 'Courses' and select the add icon.
Classic User Interface:

Updated User Interface:

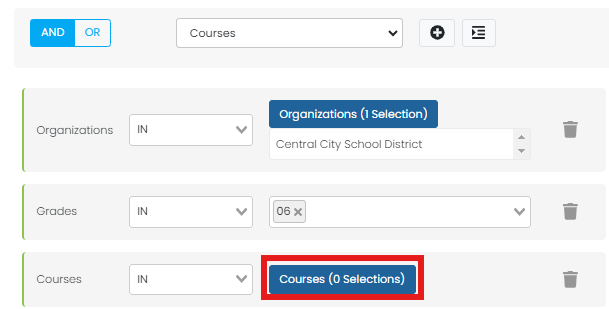
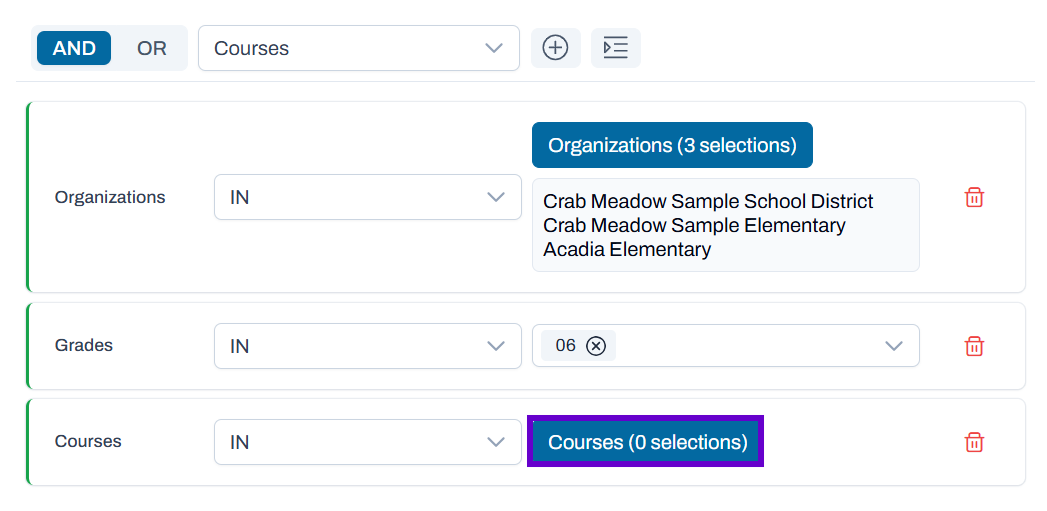
17. Select the Courses button.
Classic User Interface:
Updated User Interface:
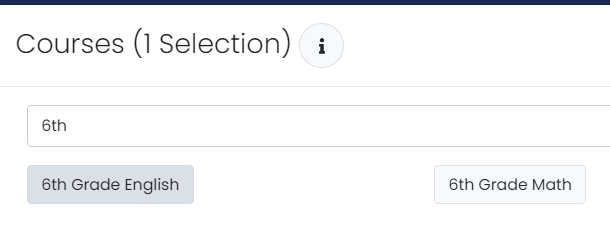
18. Select the course(s) to include. If selecting across schools with different courses codes, be sure to get all variations (e.g., Algebra II and Algebra 2).
Classic User Interface:
Updated User Interface:
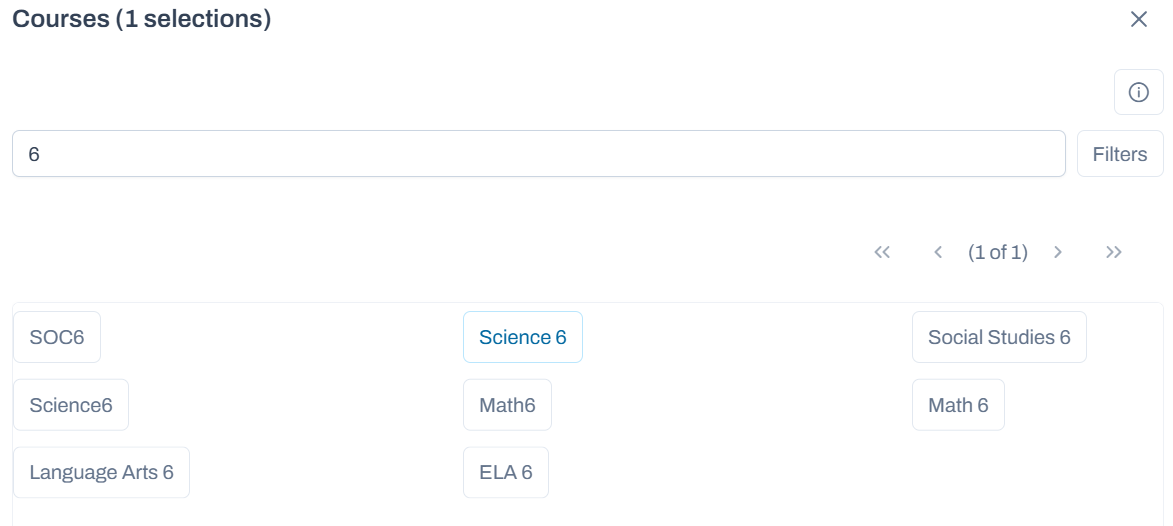
19. Select Close.
20. Select Estimate Count to check total.
21. If you have some testers to include who do not meet the eligibility criteria, use assignment tags. Add a new criteria group, select 'Tags' and change inclusion logic to OR. See also: Users: Assignment Tags.
Classic User Interface:

Updated User Interface:

22. Save Template if you will use this criteria again.
23. Optionally, select 'Disable Proctor Approval' to allow students to continue test sessions without proctor approval.
24. Select Next.
25. Verify the selected options, and then select Submit. The administration card appears on the Test Management > Administrations page. Do not be alarmed if the initial student count is zero; it will populate with the next automated rescan. See also: Administrations.
Updated User Interface:
Bulk Import
If configured for your program, authorized users can complete Administration Configuration in bulk via an import process. Programs can create and maintain large numbers of Administrations faster and with fewer errors by downloading, editing offline, and re-importing changes.
Key Capabilities:
- Export/Download existing administrations into a structured import file.
Select existing Administration > Bulk Import: Provides the ability to download existing administrations.
If no existing Administrations are selected > Bulk Import: Provides the ability to download template.
Import supports both:
Creating new administrations in bulk.
Updating existing administrations in bulk.
Template includes instructions on first tab.
Updated User Interface:

Eligibility with Test Mode
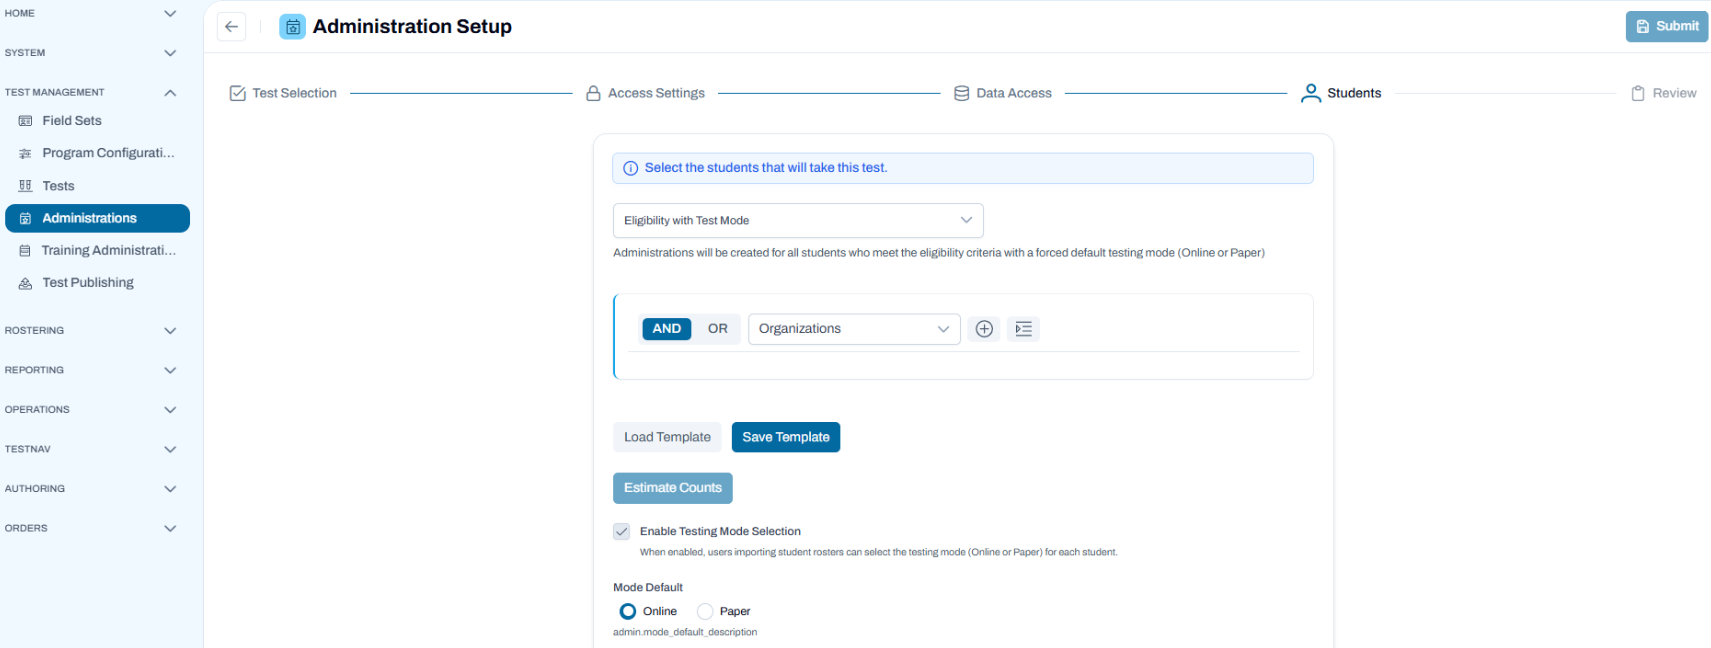
If configured for your program, you can also use the "Eligibility with Test Mode" administration type. This combines standard eligibility-based student assignment with a forced testing mode selection. Authorized users setting up an Administration can use eligibility-based student assignment while enforcing a default testing mode (Online or Paper) at the administration level so that newly eligible students added via rescan are automatically assigned with the correct delivery mode.
Key Capabilities:
Requires selecting a Mode Default (Online or Paper) during administration setup.
Rescan remains enabled—newly eligible students are automatically added and inherit the default mode.
Authorized users can manually override an individual student’s mode.
Manual overrides are preserved across subsequent rescans.
Updated User Interface:
Next Steps
A single unassigned group is created for this administration. Student sessions are not linked to a proctor/class specific proctor group in advance of the student logging in to take this administration.
Steps When Accessing Test via My Classes
Both the students and the teacher access the Proctor Dashboard via the Proctor Dashboard via the icon in My Classes. Depending on the configuration, the proctor may need to admit students into the test.
See also: My Classes: Access the Proctor Dashboard
Steps When Proctor Pre-Creates a Group
See also: Administrations: Proctor Groups
Proctors are provided with the "unassigned" test code and proctor password.
This test code and proctor password are used only by the proctor to create a proctor group for their test session. When the proctor logs into the Proctor Dashboard, they are asked to create a proctor group. Once that short form is complete:
- An email is sent to the proctor containing information about their proctor group (student test code and proctor password).
- The proctor dashboard opens.
- The student test code is displayed on the Proctor Dashboard.
- The proctor gives the student test code to the students as part of the student log in process (the test code is not included on the student test cards).
As the students sign in to the administration, they are added into the proctor group and displayed in the proctor dashboard. Proctor groups are not displayed in ADAM until the first student logs in to take the test. Until then, the proctor is the only person seeing the proctor group.
Note: If the administration requires Proctor Approval, the proctor will be notified through the proctor dashboard that a student is trying to log into the test. The proctor needs to approve this action.