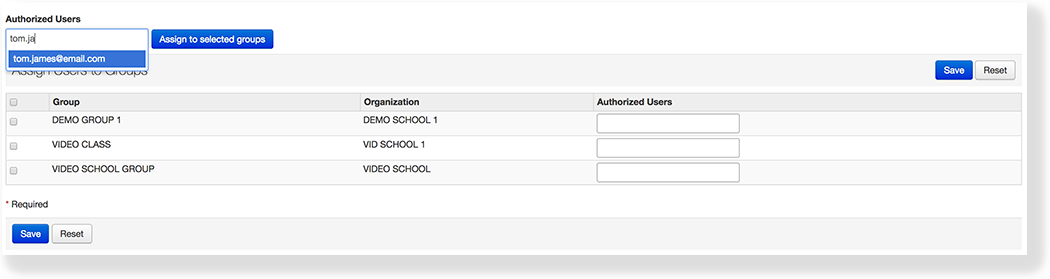
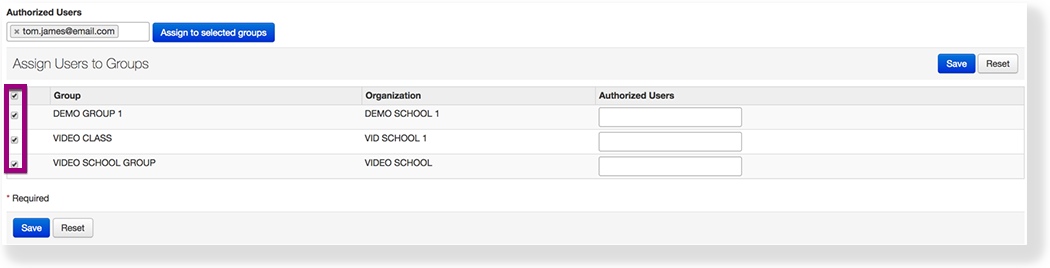
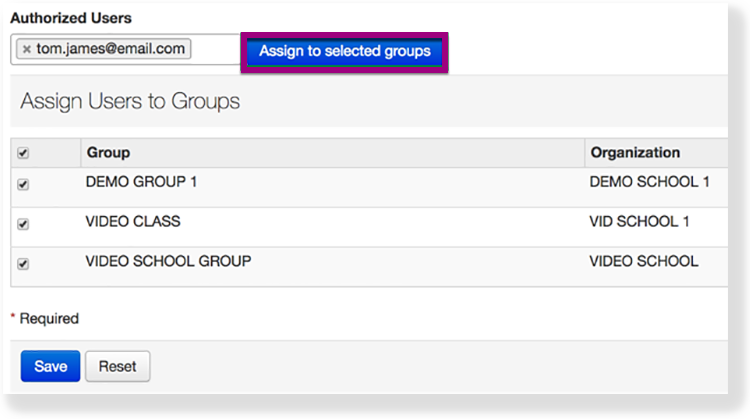
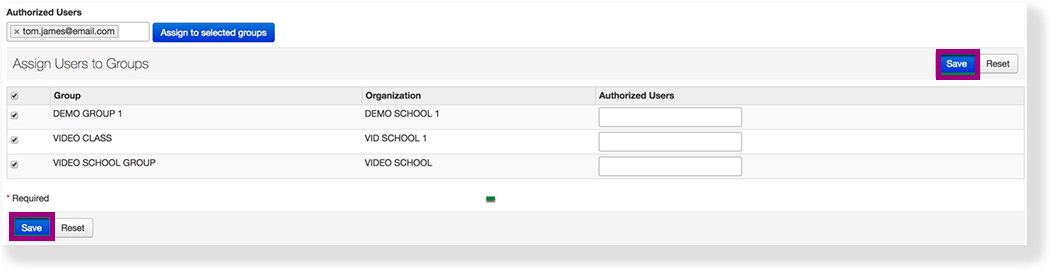
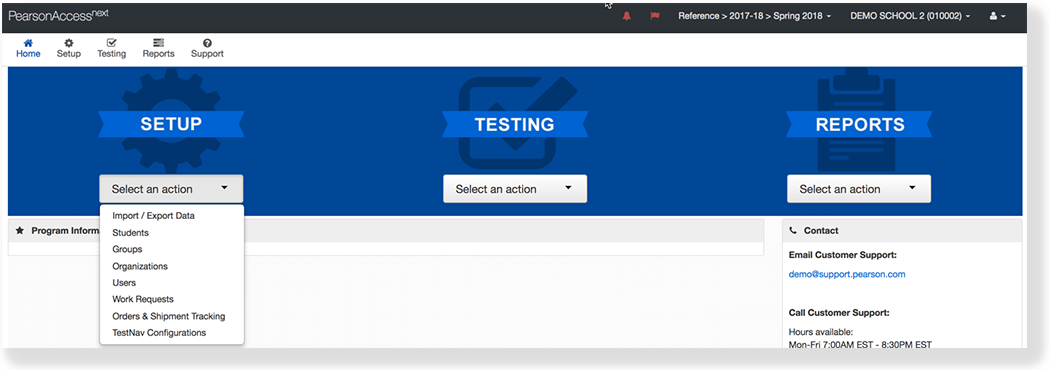
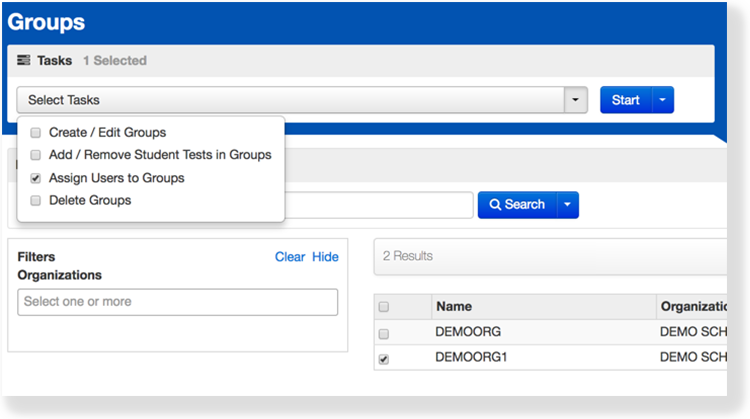
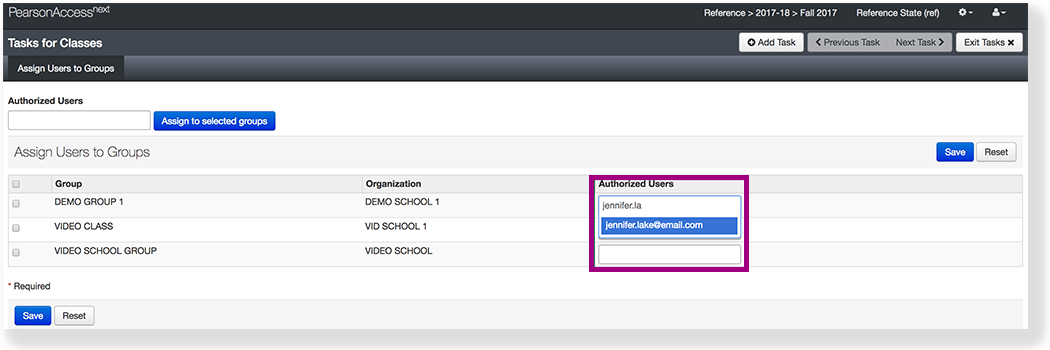
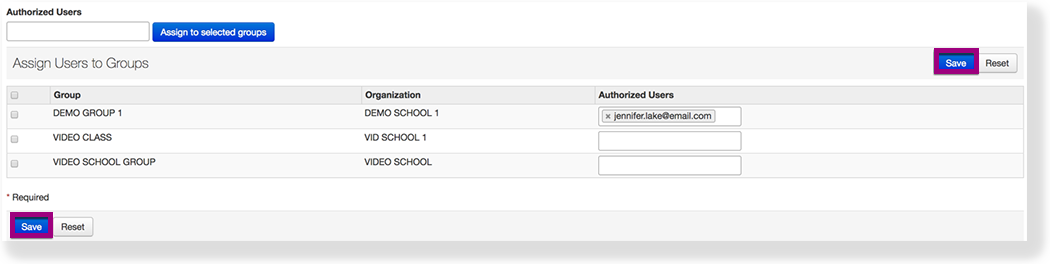
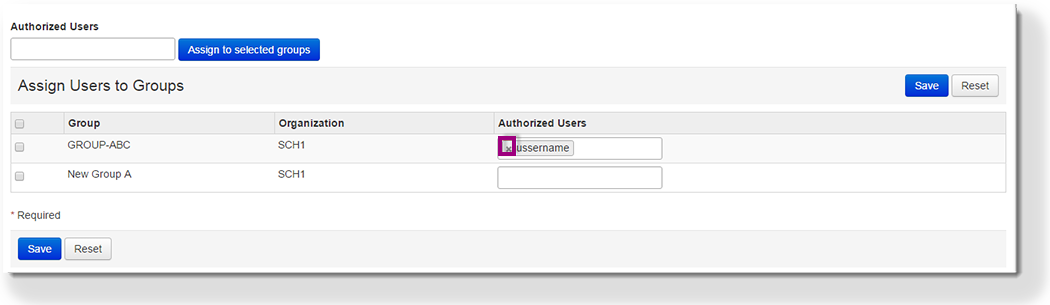
PearsonAccess Next Online Support Setup Manage Groups Current: Assign Users to Groups Assign Users to Groups You can assign users to a group to limit who can access the student data tied to the group. Step-by-Step From Setup, select Groups.Click the checkbox next to the group.Click Select Tasks, select Assign Users to Groups, and click Start.Assign the user to either multiple groups or a single group.To assign the user to multiple groups... 5. Type a user's name into the Authorized Users search field.6. Click the checkbox next to the groups.7. Click Assign to selected groups. 8. Click Save.Or, you can assign the user to a single group:5. Type a user's name into the Authorized Users search field next to the group.6. Click Save. What's Next? (Optional)To remove a previously assigned user from a group, click the X next to the user's name and click Save. ×