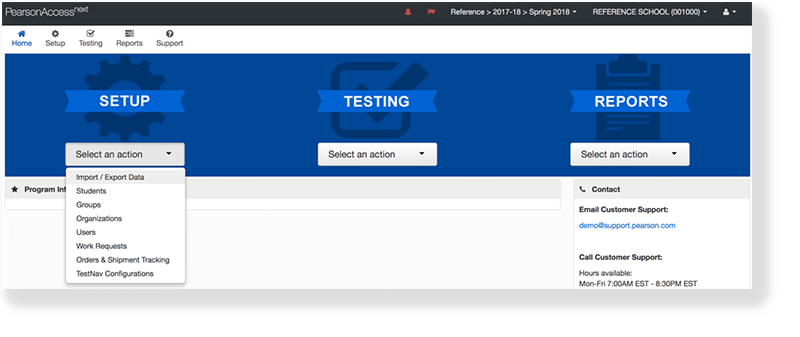
Pearson recommends importing or exporting/re-importing files that contain large amounts of data. Users can, then, access this data to update existing records and/or add new records.
Data files and fields may vary by program. For details, see Data File Descriptions and Data Field Descriptions.
Prerequisites
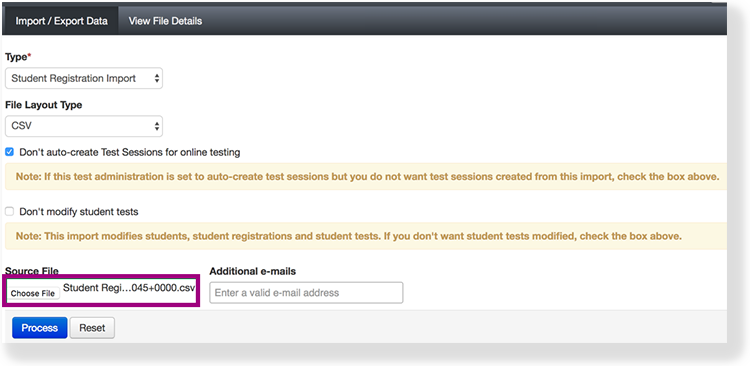
Your program works with Pearson to clearly define data file content and layout. Authorized users import data files using organization-specific instructions on file formats and data.