Operations: My Requests
Some customers implement the Admin Requests feature to send requests to an administrator. One or both of these request types may be available. Local policy will dictate in what circumstances these will apply.
- Transfer Request: Allows users to a school to indicate that they have a new student who has not yet been officially rostered at their school.
- Session Request: This is typically used to indicate that an accountability code needs to be applied to a testing session by someone who has permission to do so. You may refer to these as exception codes, not-tested codes, etc.
Utility Bar Navigation
View Existing Requests
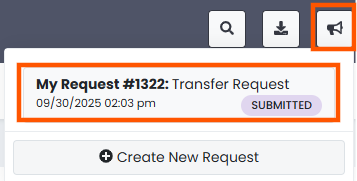
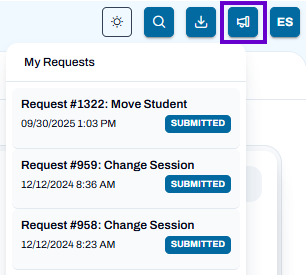
- To view existing requests, select the megaphone icon in the upper right hand corner of the site.
- Review the list of submitted requests.
- Each request displays:
- Request number
- Request type
- Date and time submitted
- Current status (for example, Submitted)
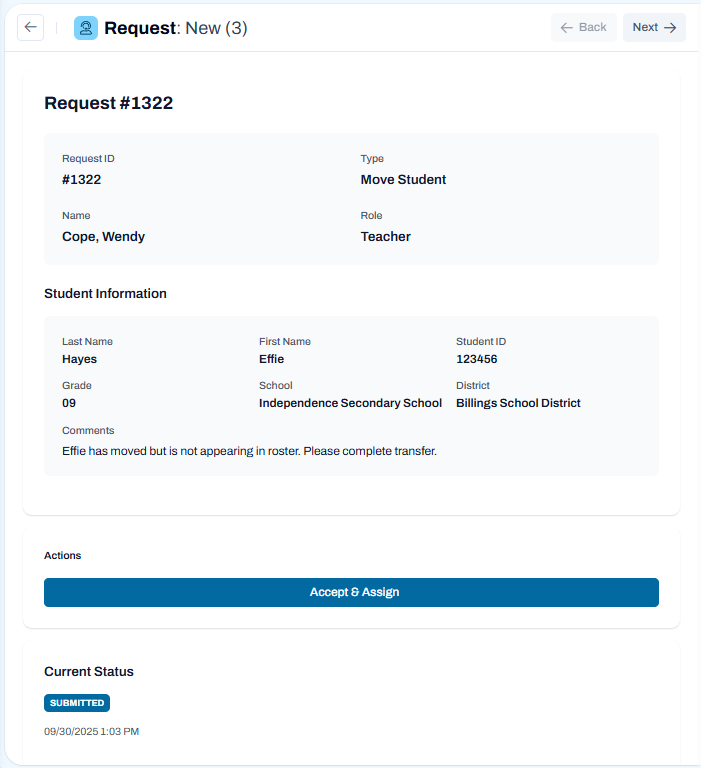
- Select a request, if available, to view additional details or progress.
Classic User Interface:
Updated User Interface:
Make a New Request
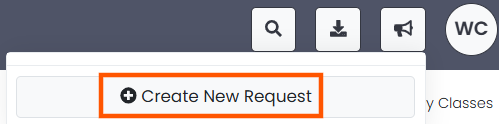
Classic User Interface:
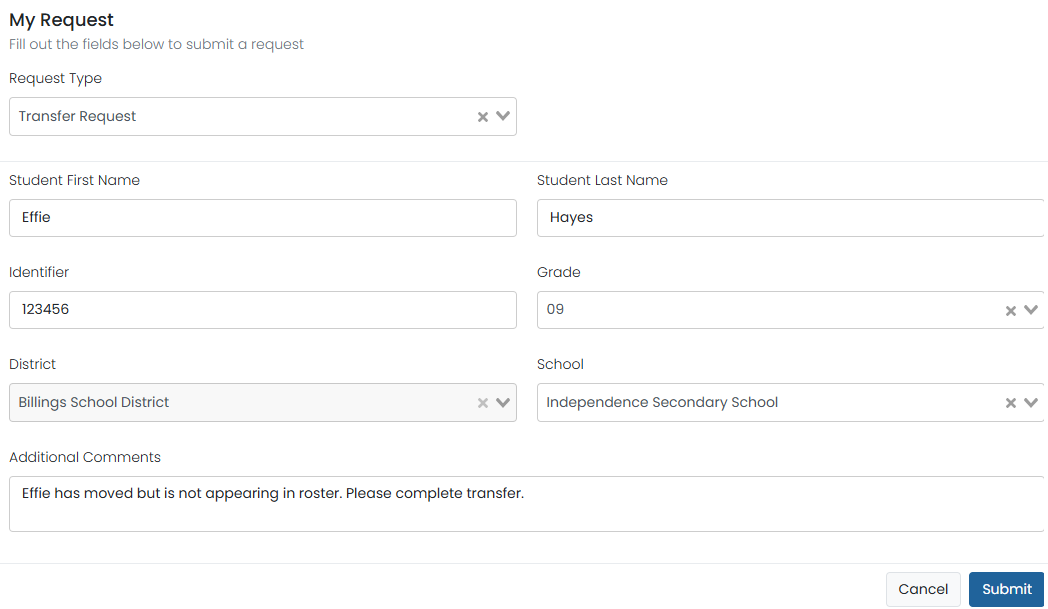
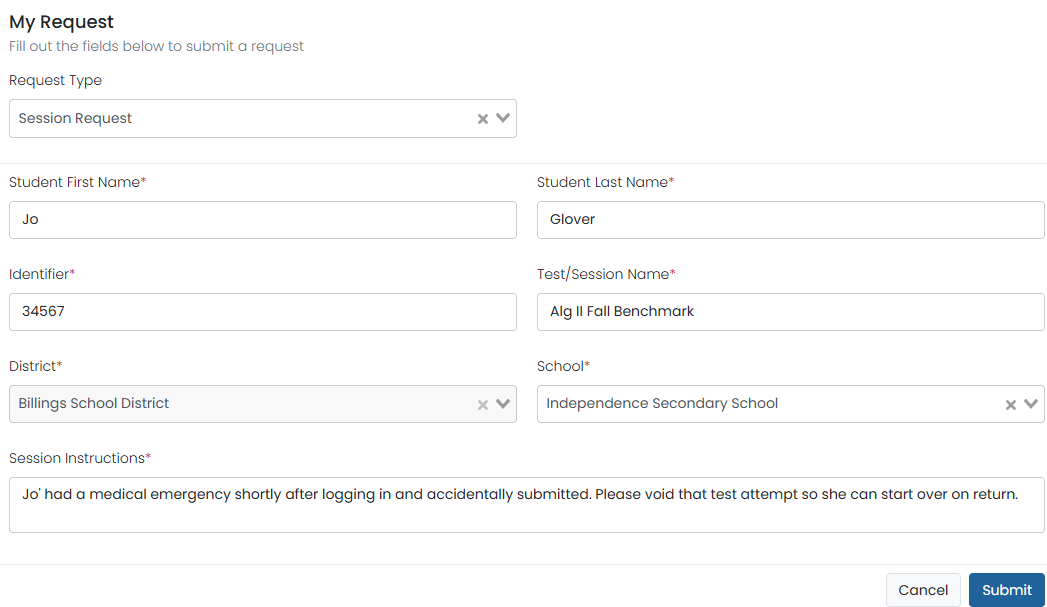

Updated User Interface:
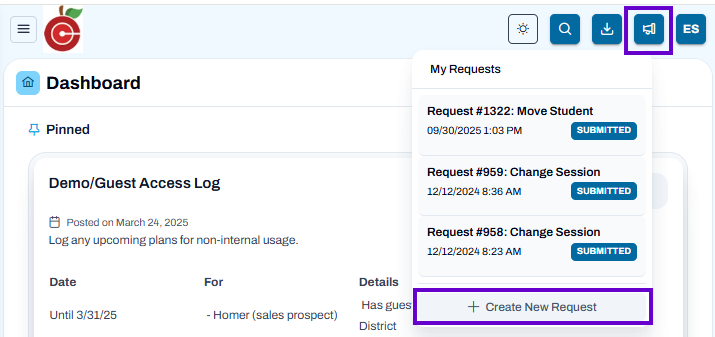
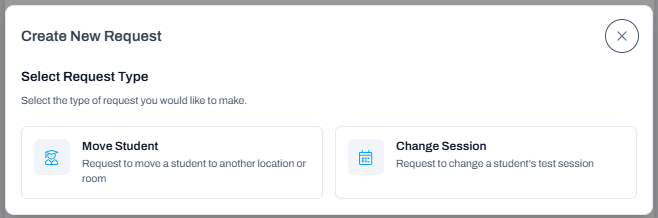
Create a New Request
- Select the My Requests icon in the toolbar.
- In the My Requests panel, select Create New Request.
- Choose the type of request you want to submit:
- Move Student – Request that a student be moved to a different room or location.
- Change Session – Request that a student be moved to a different testing session.
- Enter the required information for the selected request type.
- Review the request details and submit the request.
Tip: Use My Requests to monitor the status of submitted requests and quickly create new requests as needed.
Operations - Admin Requests Dashboard
View All
CLASSIC USER INTERFACE FUNCTIONALITY
Admin Requests > View All: Implemented the ability for admins to view all administrative requests in a single consolidated view. The feature adds a new 'All Requests' tab that combines requests from different categories (new, assigned, and user-submitted requests) for users with the appropriate permissions.
Navigation (existing permission) → System > Role Config > Rostering > Manage Requests > Manage Requests Outside of Org Scope
Navigation → System > Admin Requests > All Requests
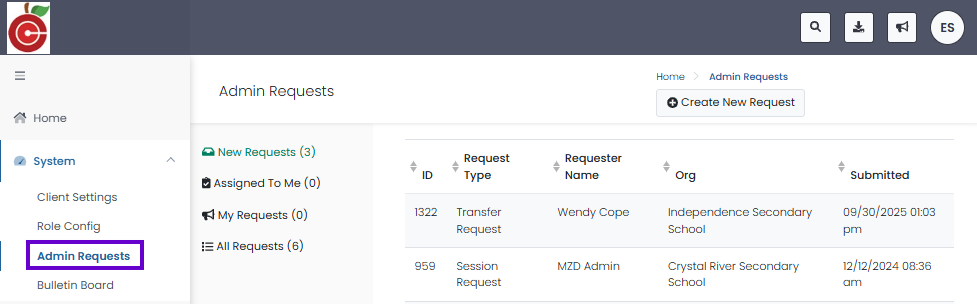
UPDATED USER INTERFACE FUNCTIONALITY
NOTE: Within the updated user interface, the Admin Request functionality is moved to the Operations section.
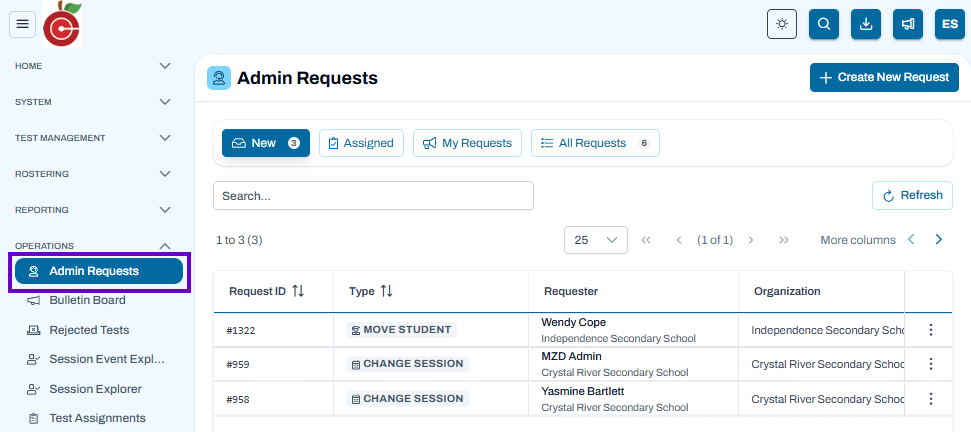
Open Admin Requests
- From the navigation menu, expand Operations.
- Select Admin Requests.
- The Admin Requests page opens and displays available requests.
Navigate Request Queues
Use the tabs at the top of the page to filter requests:
- New – Displays unassigned requests that require review.
- Assigned – Shows requests currently assigned to you.
- My Requests – Displays requests you have submitted.
- All Requests – Shows all available requests based on your permissions.
Find a Request
- Use the Search field to locate a specific request.
- Sort request data by selecting column headers.
- Select Refresh to load the latest request information.
Review Request Details
- Locate the request in the list.
- Select the request row to open its details.
- Review the request information and perform any available actions, such as assigning or processing the request.
Create a Request
- Select Create New Request in the upper-right corner.
- Choose the request type.
- Enter the required information and submit the request.
Tip: Regularly monitor the New tab to ensure student move and session change requests are processed promptly.