Most customers load their roster data via a sync with their SIS data. Sometimes there are additional users not in the roster feed who need to be added manually in LaunchPad, such as school and district administrators. Once added, these manually added users can launch LaunchPad to access the Pearson app(s) they may need for test management and/or reporting purposes (e.g., ADAM, Navvy).See also: Bulk Import Educator Accounts
Create a New User
The roles available to you to assign to new users are based on site configurations.
To create a new user:
- From the LaunchPad Pearson administrator login page, log in with your LaunchPad user account credentials.
- In the left navigation, select Users.
- From the Actions menu in the top right, select Create New User.
- Fill in the required fields to create the user(s). For ease of use, educator username and the email address can be set to the same value, all lowercase. The identifier and sourcedId value can be set to the user email as well, if that is desirable. These are all required fields, but their values can be the same.
- Select Save Changes to create the new user.
- Once the record is saved, the page will refresh to show the saved user.
- Once the user is visible in the respective assessment platform (e.g., Navvy, ADAM), you can take on the last step of sending login information to the new user. (See also: Send Welcome Email to New Users.)
The page may require them to first select their Client Name; from there, they will be redirected to their client login page where they can type in their username and password. This customer selection is saved in the user’s browser cache and will not need to be repeated each time for login. As a best practice, send an email to new users for them to be on the lookout for an email so it is not mistaken for spam.
Edit a User's Role
Each user must have at least one primary role. You can optionally add secondary roles at the same or different institutions.
- From the LaunchPad Pearson administrator login page, log in with your LaunchPad user account credentials.
- In the left navigation, select Users.
- Using available search and filters as needed, locate the user.
- Select the Edit icon.
- In the Org and Role Records tab you can:
- Select Add New Role to add a secondary role for this user.
- Remove the primary role by first adding a new role and then deleting the old one.
- Deactivate a user by selecting the Actions button and then selecting Deactivate User. When you select this action, a warning page will appear, informing you that deactivating the user will also deactivate all related records (Roles, Enrollments, etc.). Once deactivated, the user record cannot be edited in any way. The options to edit user details, roles, metadata, demographics and enrollments are not available. From the Actions menu, a “Reactivate User” option must be selected in order to un-delete the user. Upon selecting this action, a screen appears, prompting the selection of a new Primary Role and Org for the user.
- Edit the name by Selection the Actions button and then selecting Edit User Info.
- Be sure to save all changes.
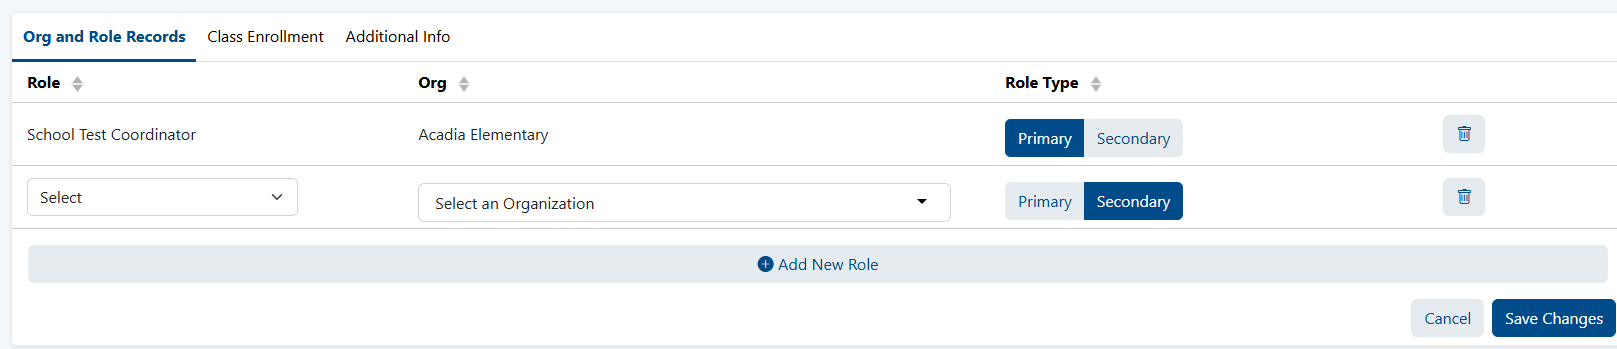 Sample Add Role window.
Tiny Link: https://support.assessment.pearson.com/x/1AE-CQ
 user-760ba, last updated on Jan 07, 2026
3 minute read
user-760ba, last updated on Jan 07, 2026
3 minute read