...
Install and set up TestNav using the sections below.
| Excerpt | |||||||
|---|---|---|---|---|---|---|---|
Install TestNav
|
...
After you download TestNav and ProctorCache, complete the following:
These ordered steps correspond to sections below or a related setup page. You can click each link to go directly to the corresponding processes.
...
Find and Set Up Response File Backups
...
When a student responds to a test question, TestNav sends the response to the Pearson server. If the network experiences a connectivity issue, or the student encounters an error, TestNav saves the response to a saved response file (SRF). For configuration details, see: Set Up and Find Saved Response Files (SRF).
Run App Check
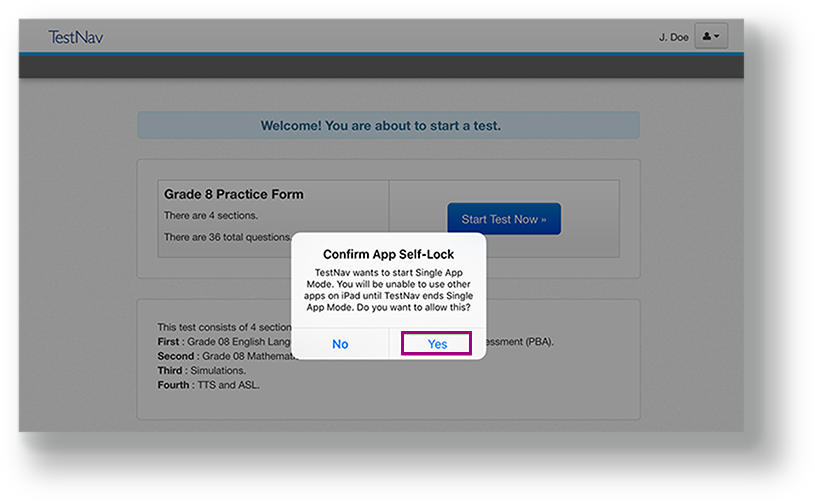
It is essential to run the App Check on each student device before testing. For details, see App Check. If presented with a Confirm App Self Lock message, click or tap Yes to continue.
Sign In to TestNav
When you are ready to start a test:
Start the TestNav app.
The first time TestNav is launched, it displays the Enable Microphone Permission message, as well as the TestNav would like to Access the Camera message.Tap or click OK to grant permission for both.
If the student taps or clicks Don't Allow, TestNav displays another prompt, shown below:
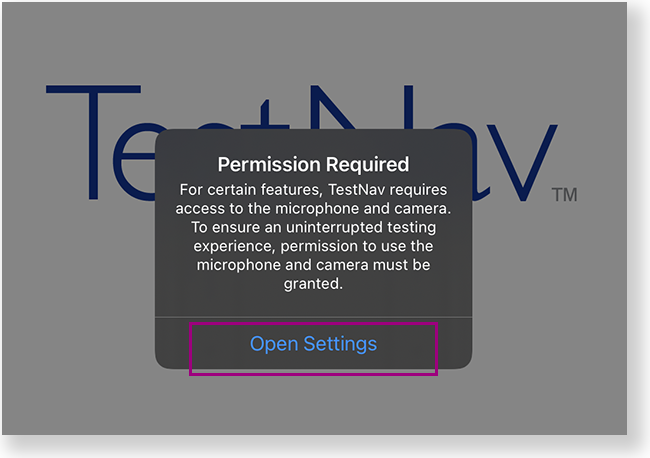
Tap or click Open Settings to enable the microphone and camera.
Tap or click
| Note |
|---|
During BOTH the infrastructure trial and the actual test, note which specific iPad each student uses during each test. The TestNav app saves SRFs to only one designated place on the testing device. If an error occurs, you can locate files only on that specific device. |
...
You can set up TestNav on an iPad for secure testing using one of the following methods:
| Expand | ||
|---|---|---|
| ||
To enable single app mode on iPad using Apple Configurator, first back up the device to retain any data or applications. Then, turn on Supervised mode for your organization to wipe the device. You can restore the iPad after testing by placing the iPad in Supervised mode to put data and apps back on the device.
To release a device from the single app mode:
|
| Expand | ||
|---|---|---|
| ||
Administrators can use Mobile Device Manager (MDM) to push a profile to devices to wirelessly turn on/off single app mode. Profile Manager is Apple's MDM solution for Mac OS X. You can select the TestNav app from the Lock to App menu and push the profile to supervised devices. |
| Expand | ||
|---|---|---|
| ||
You can also use autonomous single app mode (ASAM) to set up iPad for secure testing. ASAM is the recommended solution for LEAs to manage single app mode because it reduces administrator workload. The ASAM feature requires BOTH a Supervised iPad (which you enable only from Apple Configurator) and an MDM (either Profile Manager or third-party). With ASAM, TestNav turns Guided Access on and off, as each testing scenario requires. Administrators do not need to push profiles to devices to turn on/off single app mode. Instead administrators can grant TestNav the ability to turn on single app mode on-demand. |
| Expand | ||
|---|---|---|
| ||
Using TestNav with Guided Access
Exiting TestNav/Closing Guided Access mode
|
After you install TestNav, you must also turn off HTTP Proxy for your wireless network.
To turn off HTTP Proxy, complete the following steps:
- Tap Settings, and then, tap Wi-Fi.
Tap the arrow to the right of the connected Wi-Fi network.
Expand title Click here to view a screenshot... 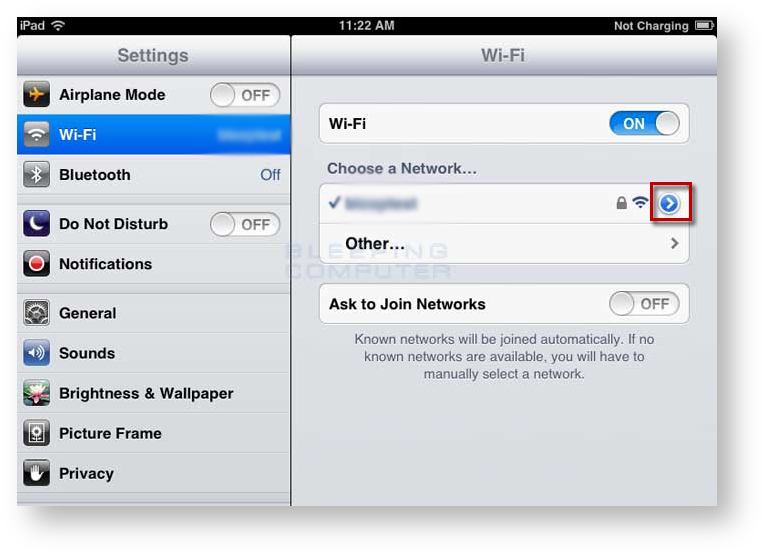
Under HTTP PROXY, if Auto is selected, tap Off.
Expand title Click here to view a screenshot... 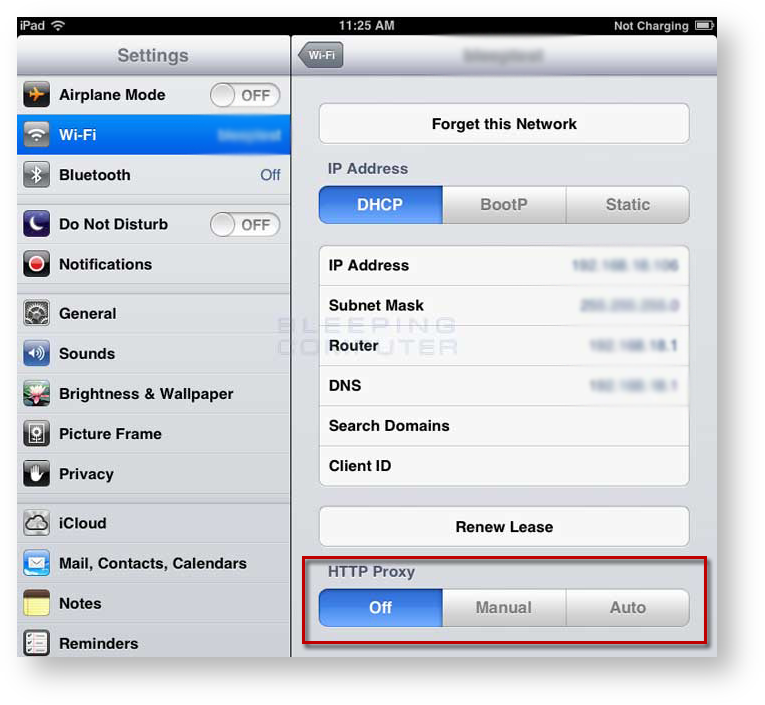
...
- Tap Settings > General > Keyboard > Auto-Correction, and slide left to turn off.
- See Predictive on the same screen, and slide left to turn off.
| Note |
|---|
Do not connect iPads to computers during testing. |
...
Start TestNav
If you have not already done so,
- Start the TestNav app.
Tap the appropriate icon for your test on the home page. If your test was selected before the test session, you see the Sign In page, rather than the home page.
If you need to select a different test, tap or click the user drop-down menu at the upper-right of the page, and tap Choose a different customer.
Tap the appropriate icon for your test.
Input your username and password on the Sign In page to begin your test.
...
Include Page IR:_TN_graphic_
...
chooseCustomer IR:_TN
...
_graphic_chooseCustomer Tap or click the appropriate icon for your test.
Include Page IR:_TN_
...
graphic_
...
installHome IR:_TN_
...
graphic_
...
installHome
Start a test to ensure that you can do so without error.
- If you see a Practice Tests link on the Sign in page, click Practice Tests and start a test.
- If you do not see a Practice Tests link, use an authorization ticket from your student management system and start a test.
- When starting a test that requires kiosk mode, the student should:
- Enter a username and password, and tap or click Sign In.
On the Confirm App Self Lock message, click or tap Yes to continue testing.
| UI Text Box | ||||
|---|---|---|---|---|
| ||||
|
On iPads, the SRF default primary save location is not customizable.
| You can find SRF and log files two ways on iPads - using Safari or a USB cable. | |
|---|---|
| Safari |
|
| USB |
|
...
| Include Page | ||||
|---|---|---|---|---|
| ||||
| Include Page | IR:_TN_SRFandLogsRelatedInfoInstall | IR:_TN_SRFandLogsRelatedInfoInstall |
...